Spring arrives with fresh energy and renewed creativity. Your nails deserve to celebrate the season too. Floral designs bring nature’s beauty to your fingertips, offering endless ways to express your style. From soft pastels to bold statement looks, spring florals work for every occasion and skill level.
This collection showcases 25 distinct floral nail designs that capture the essence of the season. Whether you prefer delicate hand-painted blooms, geometric florals, or glittery accents, you’ll find something that speaks to you. These ideas work for salon visits or DIY projects at home. Spring is the season to experiment, refresh, and let your nails bloom.
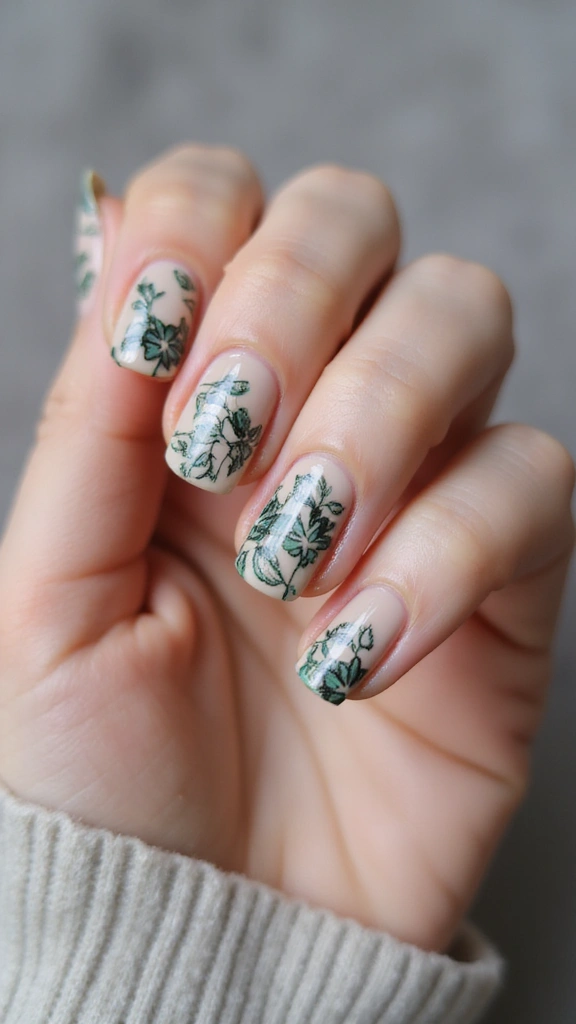
1.Vintage Floral Patterns
Vintage floral patterns bring nostalgic charm to nails. This design features small, repeating botanical motifs reminiscent of vintage wallpaper or fabric. The pattern creates a cohesive, curated look. Vintage florals work on any base color.
Vintage patterns require planning and precision. Sketch the pattern lightly before applying polish. Use thin brushes or stamping plates to create consistent repeats. Small flowers, leaves, and vines work well for pattern designs. The key is balance and spacing.
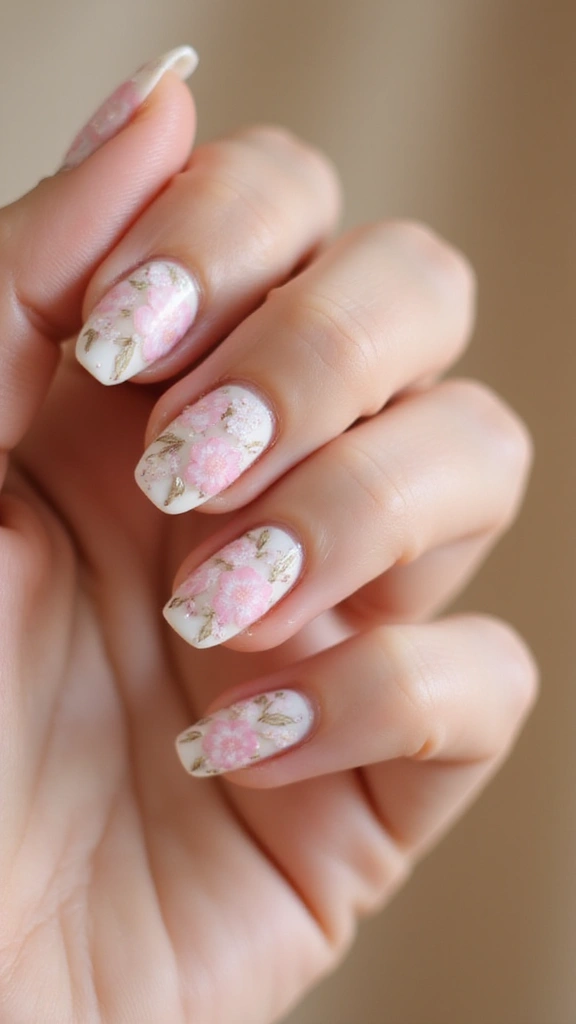
2. Elegant Cherry Blossom
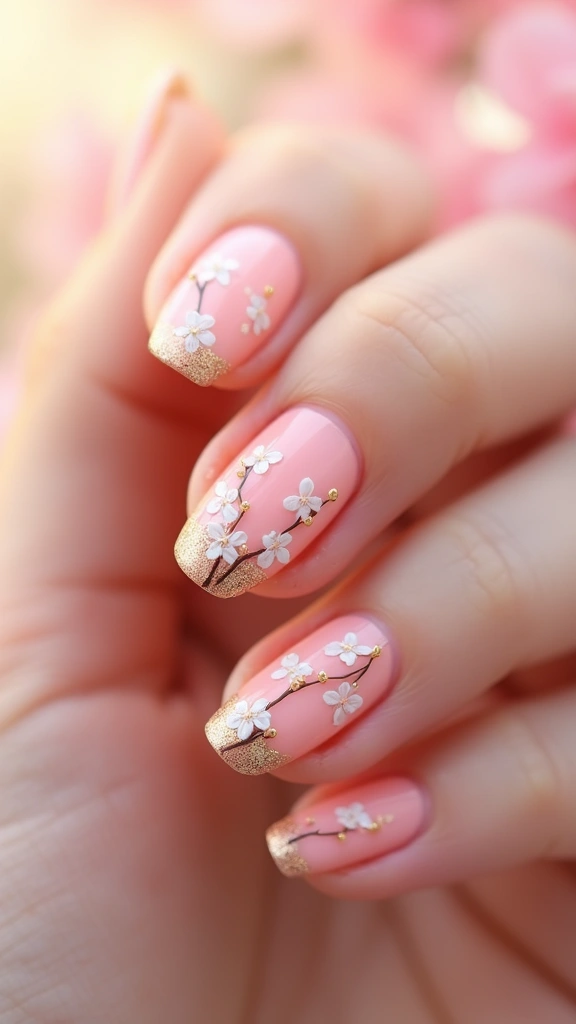
Cherry blossoms symbolize spring’s arrival and renewal. This design features delicate pink petals arranged on branches, creating a serene landscape on your nails. The soft color palette evokes the feeling of walking through a blooming orchard. Each petal is carefully placed to suggest movement and natural beauty.
Hand-painting cherry blossoms requires patience and a light touch. Start with the branch structure, then add petals in layers. The beauty lies in the organic placement. This design pairs well with nude or pale pink bases that let the blossoms take center stage.
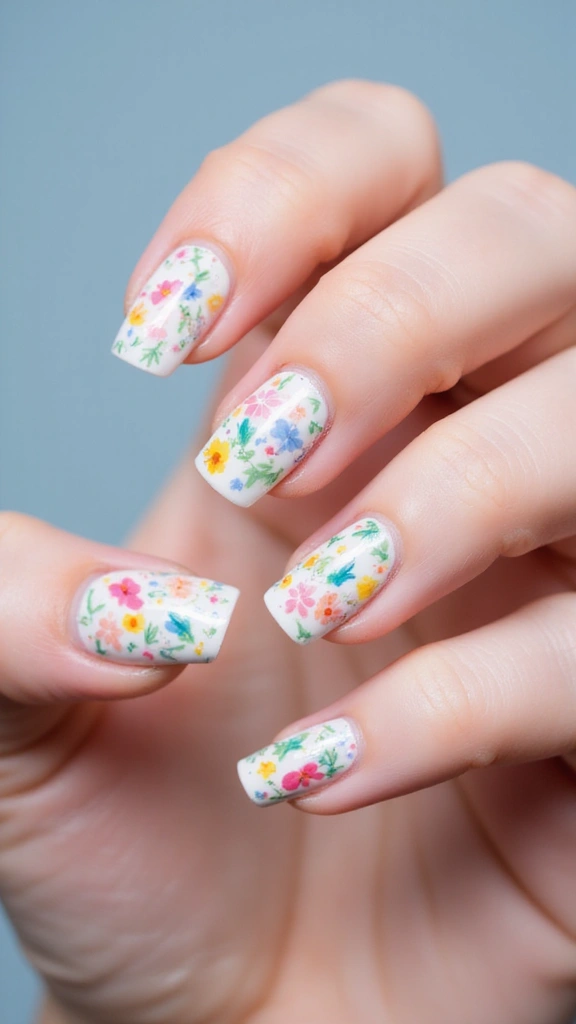
3. Whimsical Daisy Field
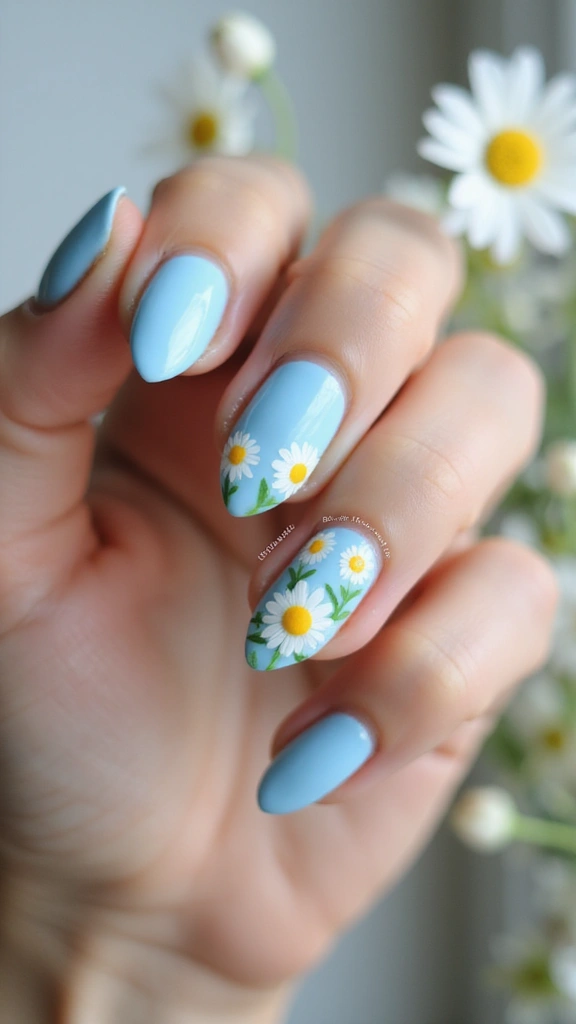
Daisies bring joy and simplicity to spring nail art. This design scatters white petals with yellow centers across the nail, creating a cheerful meadow effect. The playful arrangement feels fresh and youthful. Daisies work on any base color, though white or cream backgrounds make them pop.
The daisy design is beginner-friendly and forgiving. Simple dots and lines create the flower structure. You can use a dotting tool or thin brush to build each bloom. Layer multiple daisies at different angles for a natural field appearance.
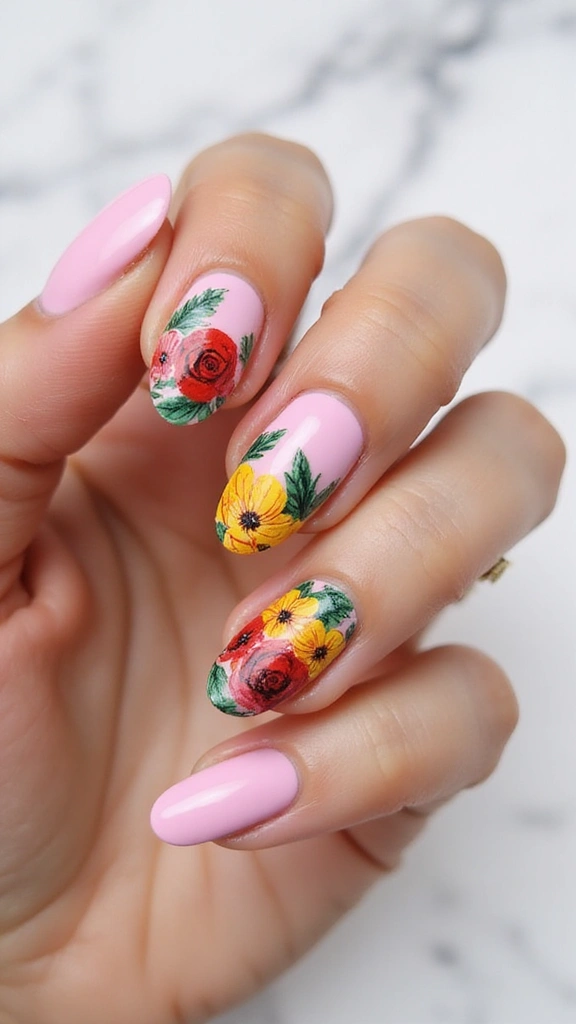
4. Romantic Rose Garden
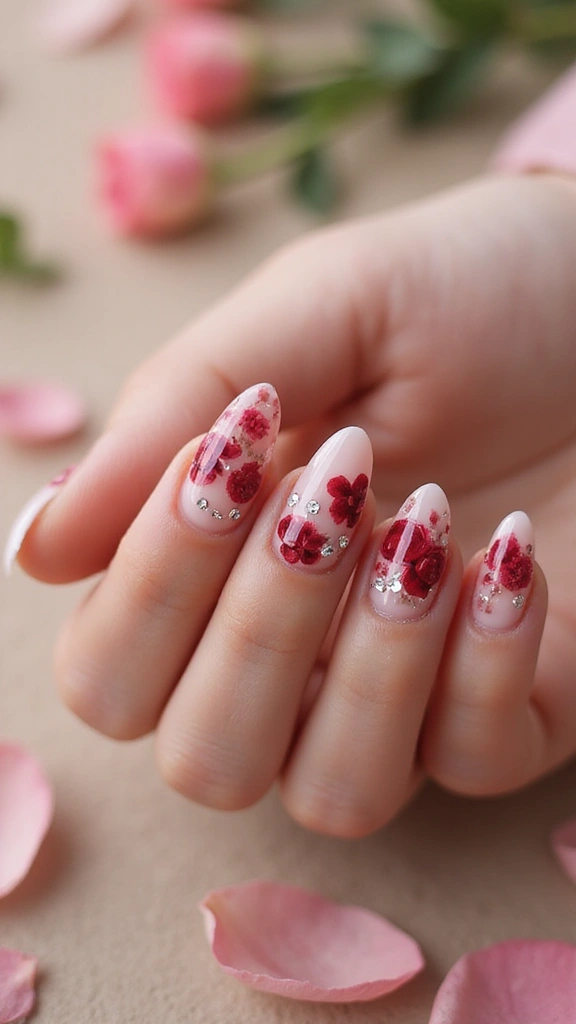
Roses represent romance and sophistication. This design features full, layered blooms in varying shades of red and pink. The depth created by overlapping petals gives each rose dimension and realism. A rose garden design works beautifully as a statement manicure.
Creating realistic roses takes practice but yields stunning results. Build petals from the center outward, using slightly different shades to create shadow and highlight. Darker tones in the center add depth, while lighter tones on outer petals suggest light hitting the bloom.
5. Playful Sunflower Burst

Sunflowers radiate warmth and happiness. This design features bold yellow petals radiating from dark brown or black centers. The geometric petal arrangement creates visual impact. Sunflowers work on neutral bases or contrasting colors.
The sunflower design is highly customizable. You can create realistic petals or stylized geometric shapes. Vary the petal length and angle for organic appeal. Add green leaves or stems to complete the botanical scene. This design works as a full manicure or accent nail feature.
6. Fun Floral Geometric
Geometric patterns and florals blend beautifully in contemporary nail art. This design combines flower shapes with clean lines, triangles, and abstract forms. The mix of organic and structured elements creates visual interest. This style feels current and artistic.
The geometric floral approach allows creative freedom. Start with simple shapes like triangles or hexagons, then add floral elements within or around them. Use contrasting colors to make geometric sections pop. Negative space plays an important role in this design.
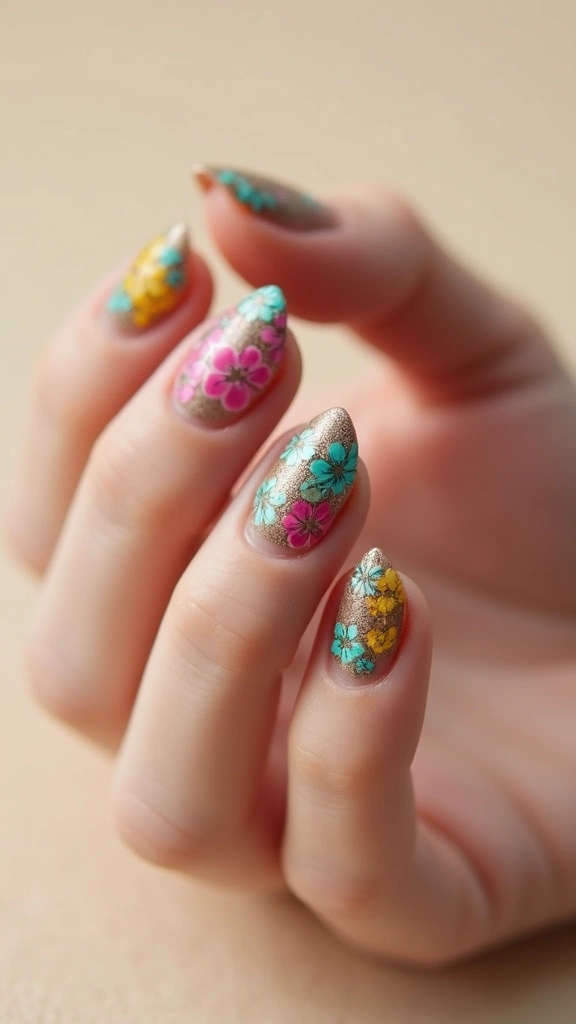
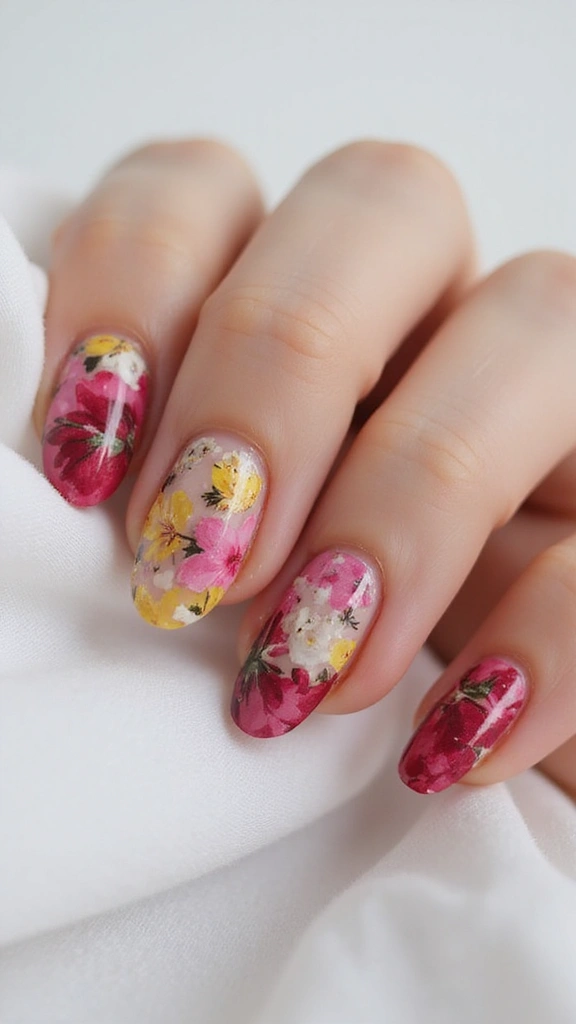
7. Tropical Floral Paradise
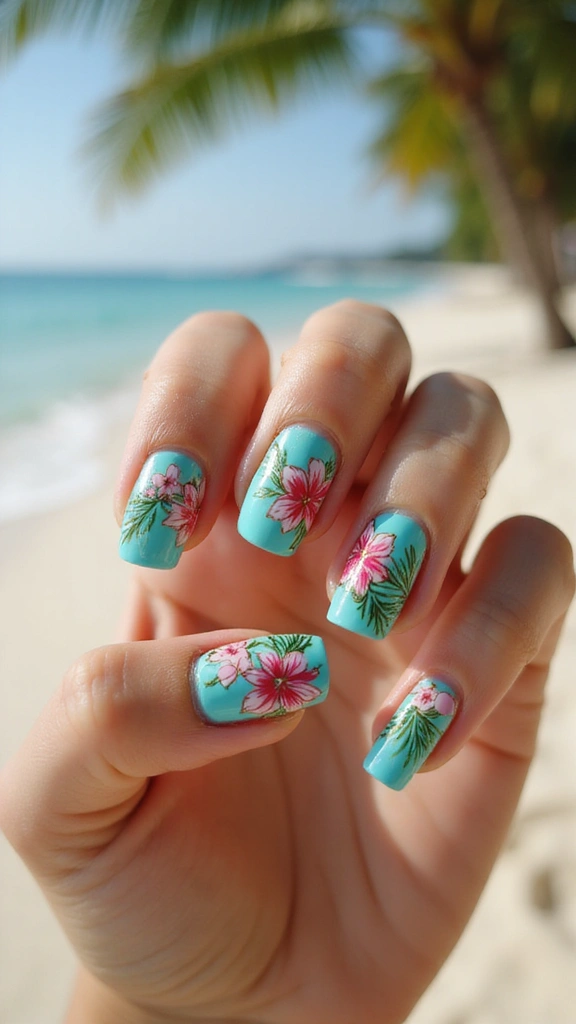
Tropical flowers bring vacation vibes to your nails. This design features vibrant hibiscus, orchids, and exotic blooms in bold colors. The lush arrangement creates a paradise scene on each nail. Tropical florals work on bright or dark bases.
Tropical designs embrace bold color combinations. Bright pinks, oranges, purples, and greens create energy and movement. Layer flowers at different depths for a full, abundant feeling. Add leaves and vines to complete the jungle aesthetic.
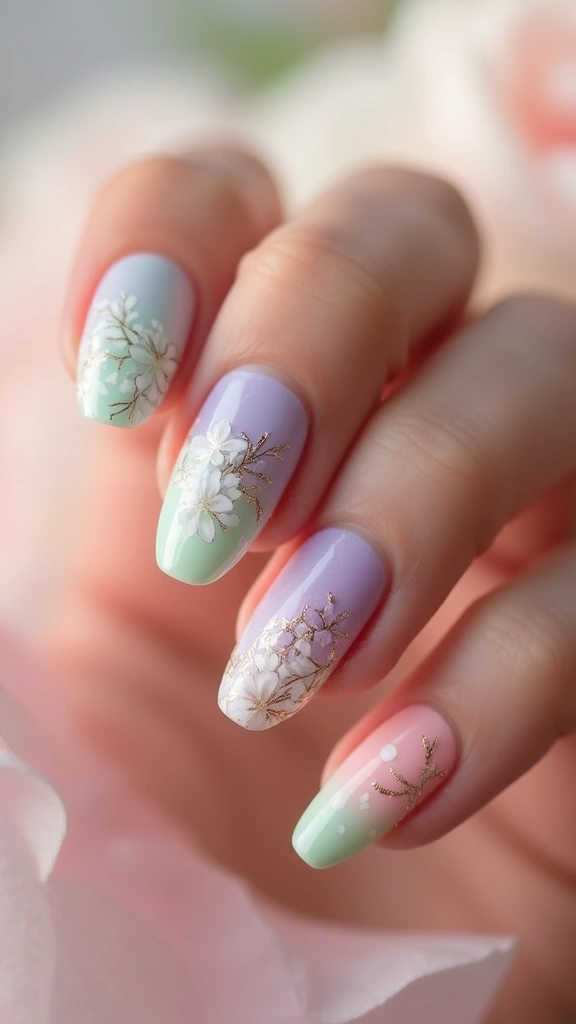
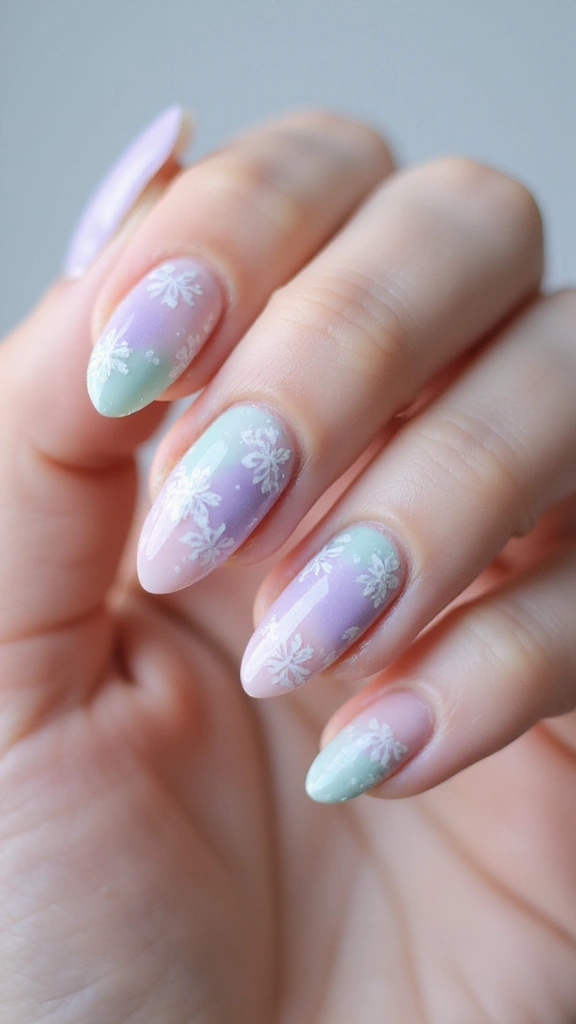
8. Elegant Ombre Florals
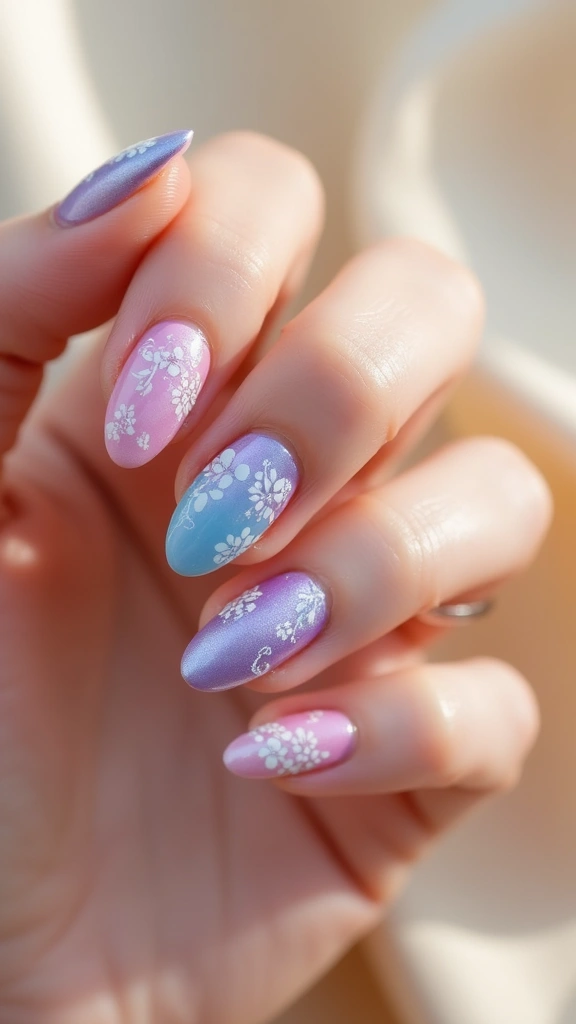
Ombre effects add sophistication to floral designs. This design features a gradient background that transitions between complementary colors, with floral elements placed strategically. The color flow creates depth and visual movement. Ombre florals work for both subtle and bold color combinations.
Creating ombre backgrounds requires blending technique. Use a sponge to apply multiple polish colors, blending where they meet. Once the base is set, add floral details on top. The gradient background makes flowers appear to float.
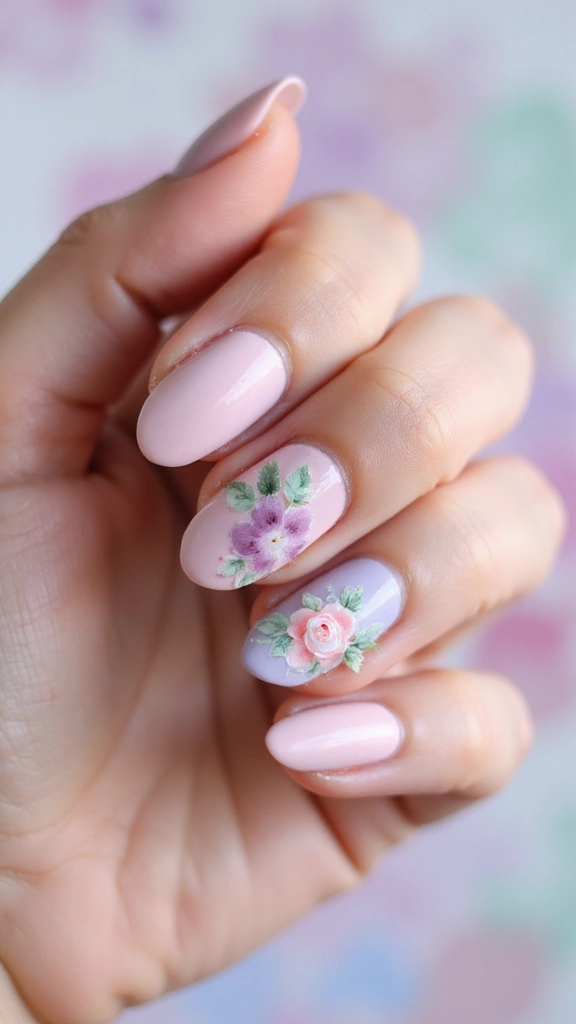
9. Bold Floral Accents
Bold accents make flowers stand out dramatically. This design features one or two large, detailed flowers on a neutral or solid color base. The simplicity of the base lets the floral artwork shine. This approach suits professional settings and everyday wear.
The accent nail technique focuses attention on quality over quantity. Choose one nail per hand for the floral feature. Invest time in detailed, realistic flower painting. The neutral surrounding nails create a gallery effect.
10. Artistic Floral Watercolor
Watercolor techniques create soft, dreamy floral designs. This design mimics watercolor painting with soft color transitions and organic shapes. Flowers appear to bloom and blend into the background. Watercolor florals work on light or white bases.
Watercolor nail art uses thin polish and blending techniques. Apply colors while the base is still wet, allowing them to merge naturally. Use a damp brush to soften edges and create flow. The imperfection of watercolor adds to its charm.
11. Floral French Tips
French tips get a floral update in this design. Instead of solid white tips, delicate flowers replace the traditional line. This modern twist on a classic style feels fresh and elegant. Floral French tips work for any occasion.
The floral French tip technique starts with a traditional base. Paint the tip area, then add small floral details instead of a solid line. Flowers can be simple dots and lines or more detailed blooms. The key is maintaining the French tip silhouette while incorporating botanical elements.
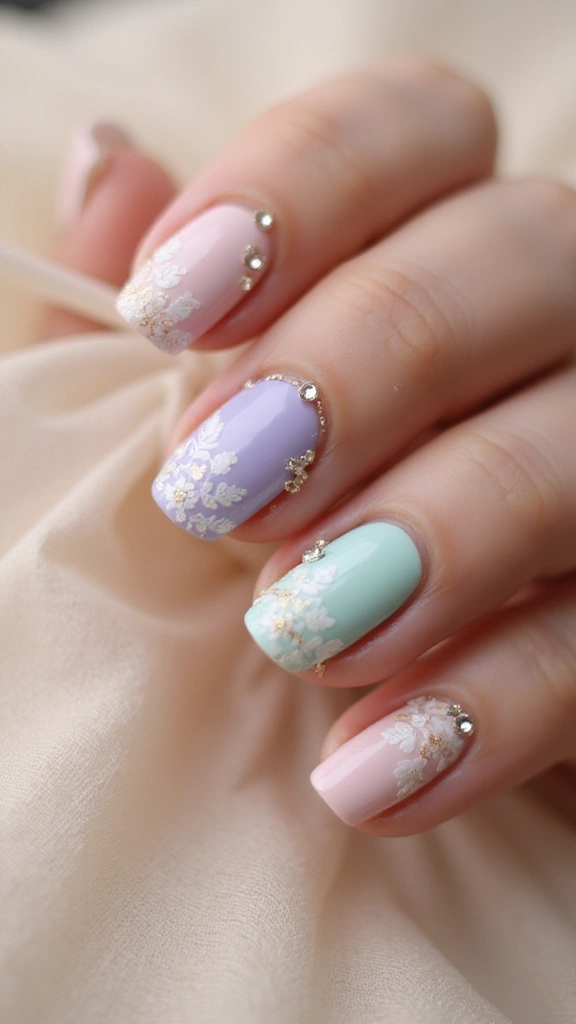
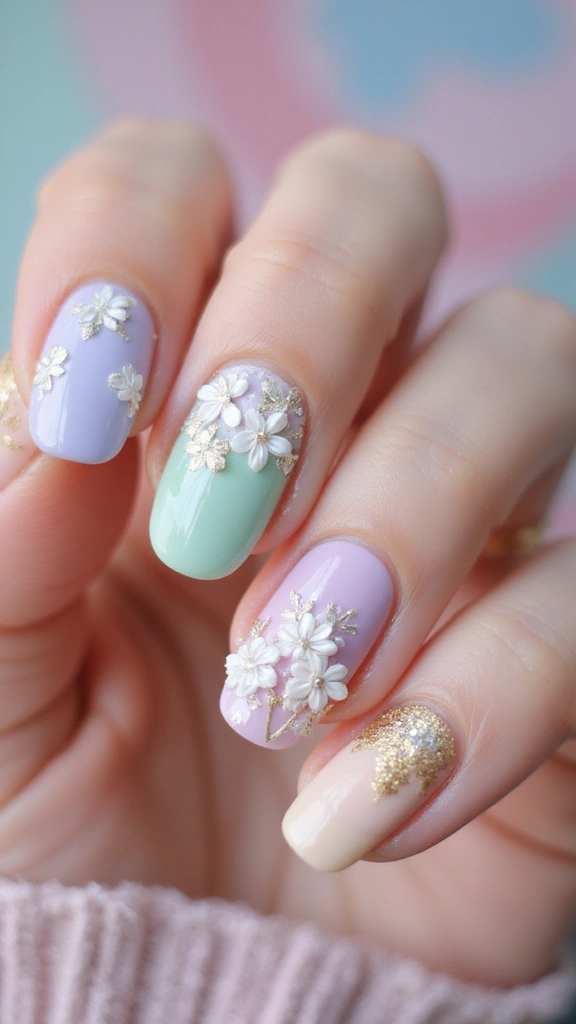
12. Elegant Floral Accents with Glitter
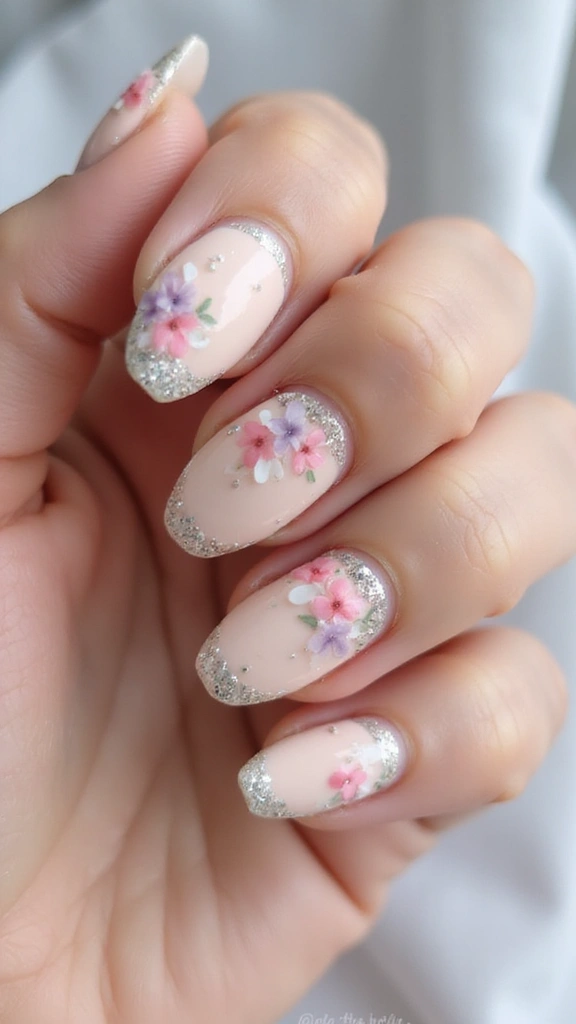
Glitter adds glamour to floral designs. This design pairs delicate flowers with strategic glitter placement. The sparkle catches light and draws attention to the botanical elements. Floral glitter accents work for special occasions or anyone who loves a touch of shine.
Combining flowers and glitter requires thoughtful placement. Add glitter around flower petals, in the center of blooms, or as a scattered accent. Use fine glitter for sophistication or chunky glitter for drama. The glitter should complement rather than overwhelm the flowers.
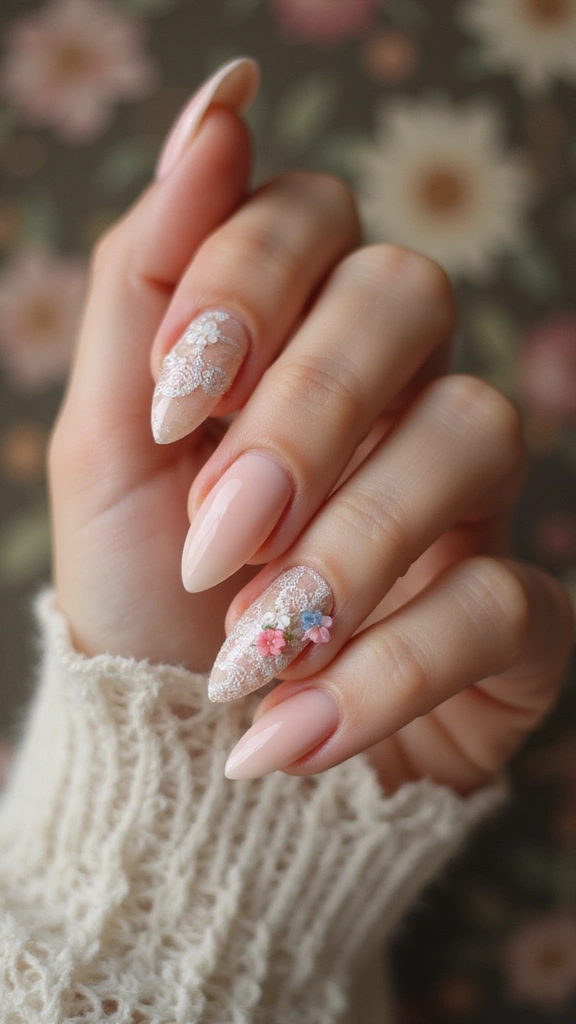
13.Vintage Floral Lace
Lace patterns bring timeless elegance to spring nails. This design combines intricate floral details with a soft, romantic aesthetic. The delicate linework creates depth without overwhelming the nail surface. Vintage lace works beautifully on neutral bases, allowing the botanical elements to shine. This style suits both casual outings and formal events.
The technique requires steady hands or a quality stamping plate. Thin brushes help achieve the fine details that make lace designs special. Pair this look with a matte topcoat for an understated finish, or add gloss for dimension.
14. Floral Lace and Rhinestones
Rhinestones elevate floral lace designs. This design combines delicate lace patterns with strategically placed rhinestones. The sparkle adds luxury and dimension. Floral lace with rhinestones works for formal events and special occasions.
Adding rhinestones to lace designs requires precision. Paint the lace pattern first, then place rhinestones at key points. Use tweezers for accurate placement. Rhinestones work beautifully at flower centers or along lace lines. Ensure they’re secure with quality adhesive.
15. Neon Floral Explosion
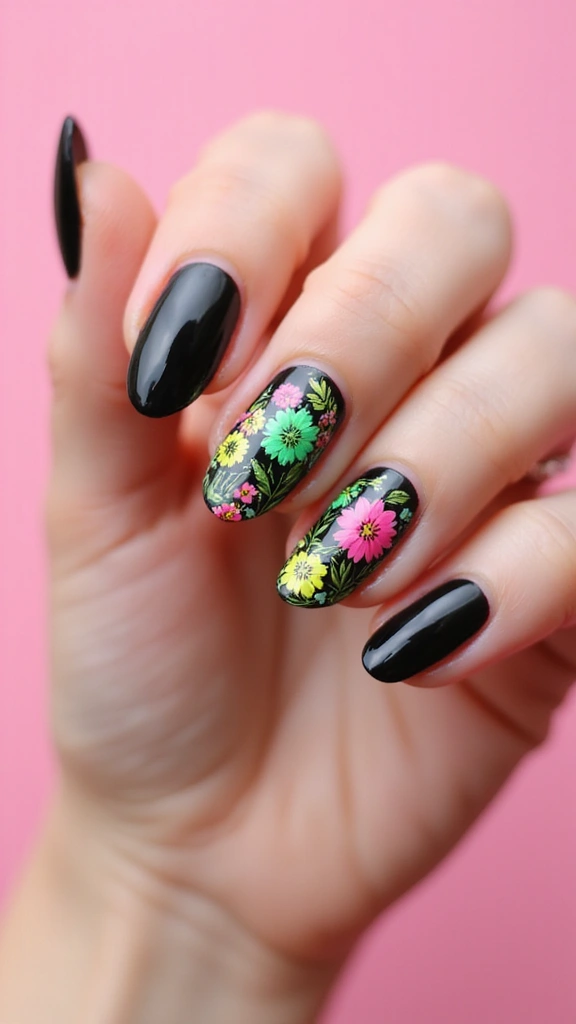
Neon florals make bold statements. This design features bright, electric flower colors that practically glow. The vibrant palette creates energy and excitement. Neon florals work on dark or neutral bases.
Neon polish requires careful application for best results. Use quality neon formulas that deliver true color. Apply thin coats to avoid streaking. Neon colors pop beautifully against black or white bases. Layer multiple neon shades for a rainbow effect.
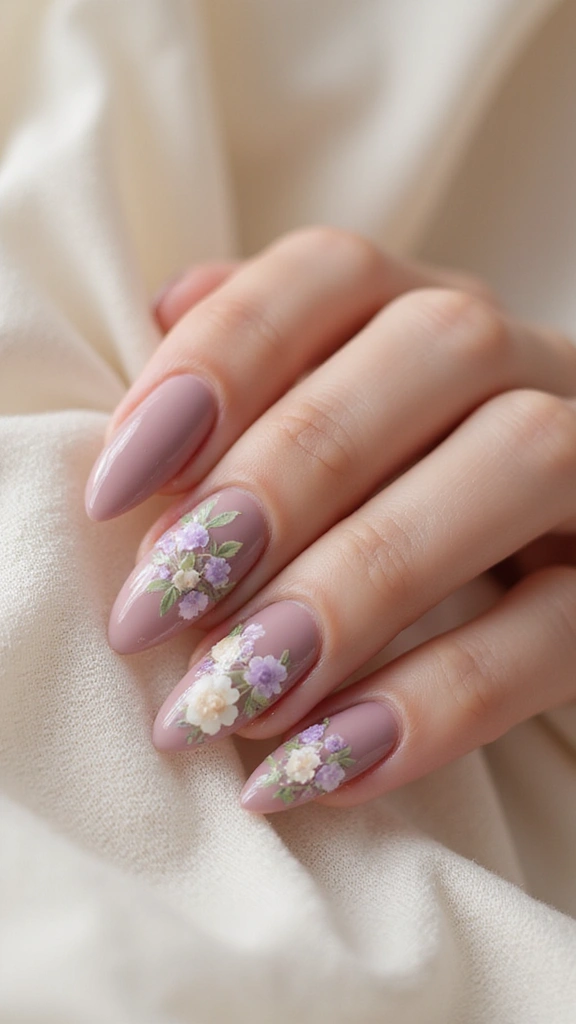
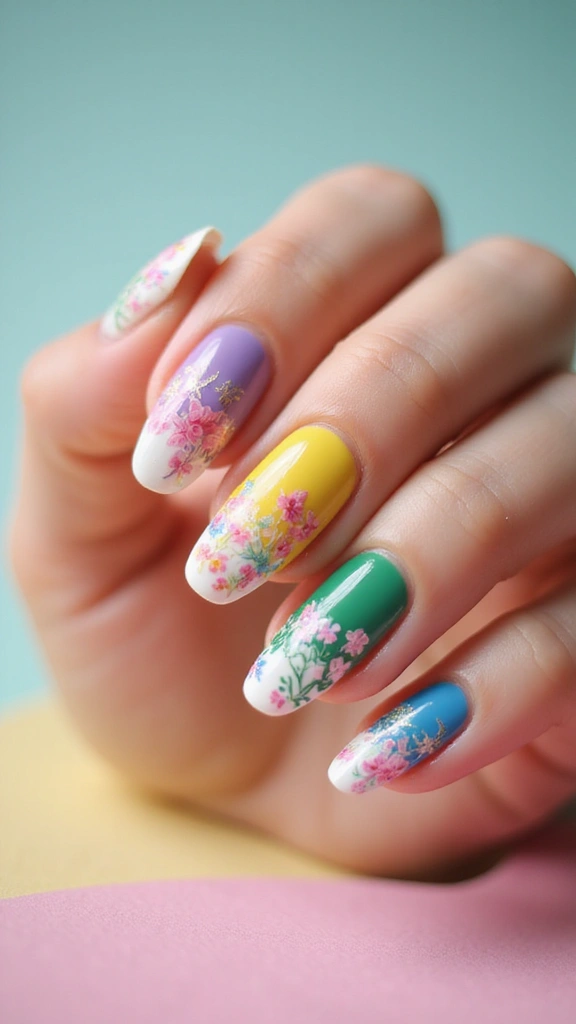
16. Classic Floral Elegance
Classic floral designs never go out of style. This design features traditional flower arrangements with refined color palettes. The timeless aesthetic works for any season or occasion. This style remains relevant year after year.
Classic floral designs emphasize quality and technique. Choose traditional flowers like roses, tulips, or peonies. Use refined color combinations like blush and cream or burgundy and gold. Focus on realistic painting and proper proportions.
17. Glossy Floral Accents on Neutral Base
Glossy finishes make floral accents shine. This design places shiny floral details on a matte or neutral base. The contrast between finishes creates visual interest. This technique suits those who love textural contrast.
Creating glossy accents requires two different topcoats. Paint the base with matte topcoat, then apply glossy topcoat only to the floral areas. The shine draws attention to the botanical elements. This technique works beautifully with metallic or holographic polishes.
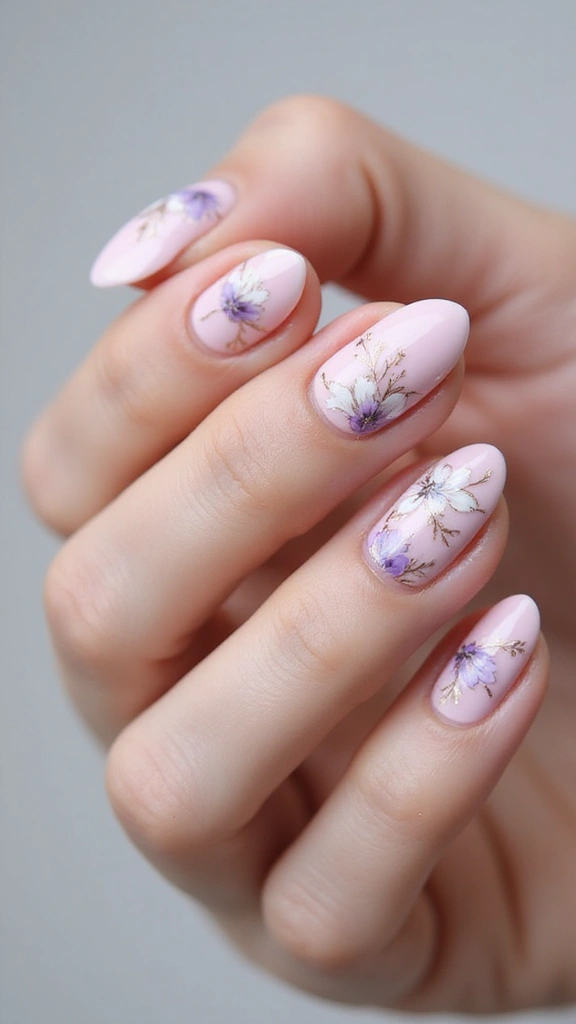
18. Artistic Floral Sketches
Sketch-style florals feel artistic and personal. This design features hand-drawn flowers with visible lines and minimal color. The sketch aesthetic celebrates imperfection and artistic expression. Floral sketches work on light bases.
Creating sketch-style designs requires confidence in line work. Use thin brushes or fine-tipped pens to draw flowers. Keep lines visible rather than filling completely. Add minimal color, allowing the sketch to remain the focal point. The result looks like wearable art.
19. Mixed Media Floral Art
Mixed media approaches combine multiple techniques. This design blends hand painting, stamping, glitter, and other elements into one cohesive look. The layered approach creates depth and interest. This style celebrates creativity and personal expression.
Mixed media designs require planning and skill. Start with a base technique, then layer additional elements. Combine stamped patterns with hand-painted details. Add glitter, rhinestones, or foil accents. Ensure all elements work together harmoniously.
20. Floral Crescent Moon
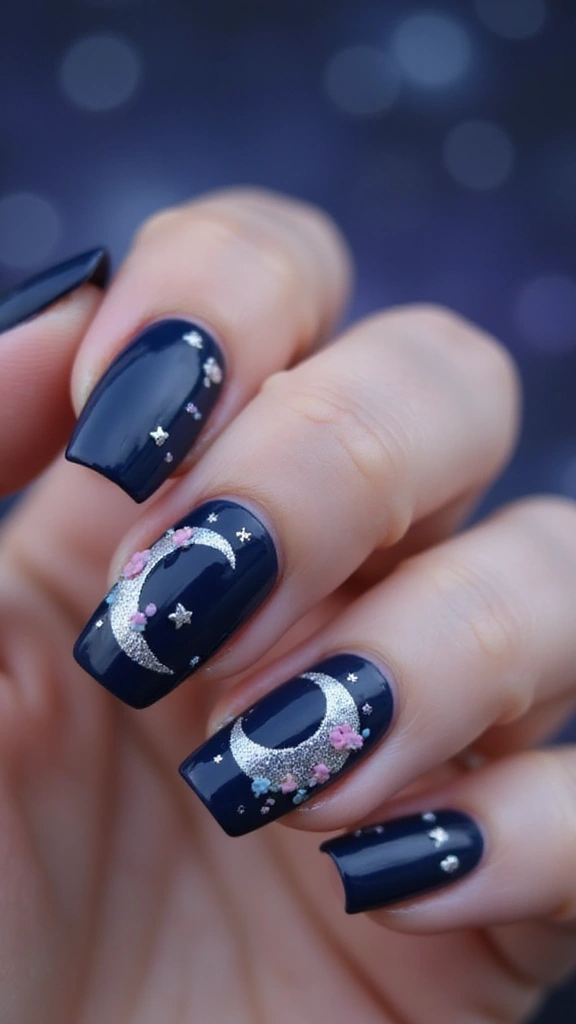
Lunar elements add mystique to floral designs. This design features a crescent moon shape filled with or surrounded by flowers. The celestial botanical combination feels magical. Floral moons work on dark or light bases.
Creating crescent moon designs requires careful shaping. Paint the moon outline first, then add floral details inside or around it. Use contrasting colors to make the moon stand out. Flowers can be realistic or stylized.
21. Floral Drip Art
Drip effects add movement to floral designs. This design features flowers with paint or polish dripping downward. The flowing effect creates dynamic visual interest. Floral drips work on any base color.
Creating drip effects requires careful application. Paint flowers at the top of the nail, then apply thin lines of polish that drip downward. Use gravity to create natural flow. The drips should appear intentional rather than accidental.
22. Floral Nail Wraps
Nail wraps offer easy floral designs. This design uses pre-printed wraps featuring floral patterns. Wraps provide full coverage with minimal effort. Floral wraps work for anyone seeking salon-quality results at home.
Applying nail wraps requires proper technique. File nails smooth and push back cuticles. Select the correct wrap size for each nail. Apply wraps smoothly, avoiding air bubbles. Trim excess and seal edges with topcoat. Quality wraps last two to three weeks.
23. Floral Foil Accents
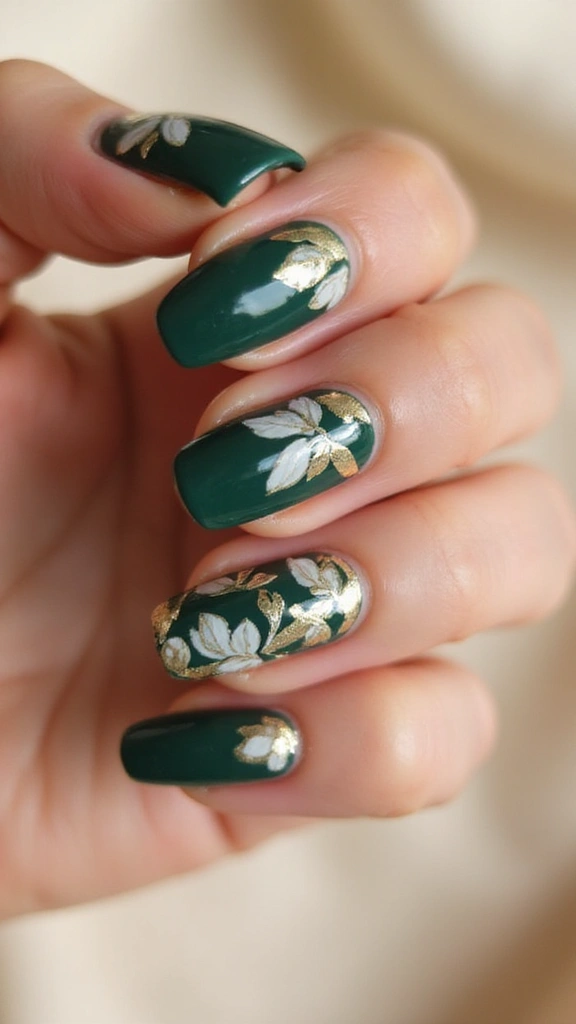
Foil accents add metallic shine to florals. This design features flowers with foil details that catch light beautifully. The metallic elements create glamour and dimension. Floral foil accents work for special occasions.
Creating foil accents requires special foil and adhesive. Paint flowers first, then apply foil adhesive to specific areas. Press foil onto the adhesive and peel away. The foil sticks to the adhesive, creating metallic details. This technique works beautifully with gold, silver, or holographic foils.
24. Floral Stamping Designs
Stamping creates precise floral designs. This design uses stamping plates featuring floral patterns. Stamping provides consistent, detailed results. Floral stamping works for anyone seeking detailed designs without hand painting.
Stamping requires quality plates and tools. Choose floral stamping plates with designs you love. Apply stamping polish to the plate, scrape excess, and stamp onto nails. Practice proper pressure and angle for clear impressions. This technique saves time while delivering professional results.
25. Floral and Watercolor Mix
Combining florals with watercolor creates artistic depth. This design blends realistic flowers with soft watercolor backgrounds. The mix of techniques creates visual interest and sophistication. This style celebrates both precision and spontaneity.
Creating this combination requires layering techniques. Start with a watercolor background, allowing colors to blend naturally. Once dry, add detailed floral elements on top. The watercolor provides texture while flowers add focus. The result feels gallery-worthy and unique.

Leave a Reply