Natural hair deserves styles that celebrate its texture and strength. Braided updos offer versatility, protection, and elegance all in one. Whether you’re heading to work, a special event, or simply want to refresh your everyday look, these tutorials will guide you through each step. From classic French braids to modern fishtail variations, you’ll find options that suit your skill level and lifestyle. The beauty of braided updos lies in their adaptability. You can wear them sleek and polished or soft and romantic. Many styles take less than thirty minutes once you master the technique. This guide breaks down seventeen distinct braided updo styles with clear instructions and visual references. Each tutorial focuses on achievable steps that work with natural hair textures. You’ll learn how to prep your hair, execute the braid, and secure the final look. No special tools required, just patience and practice. Let’s explore the styles that will transform your hair routine.
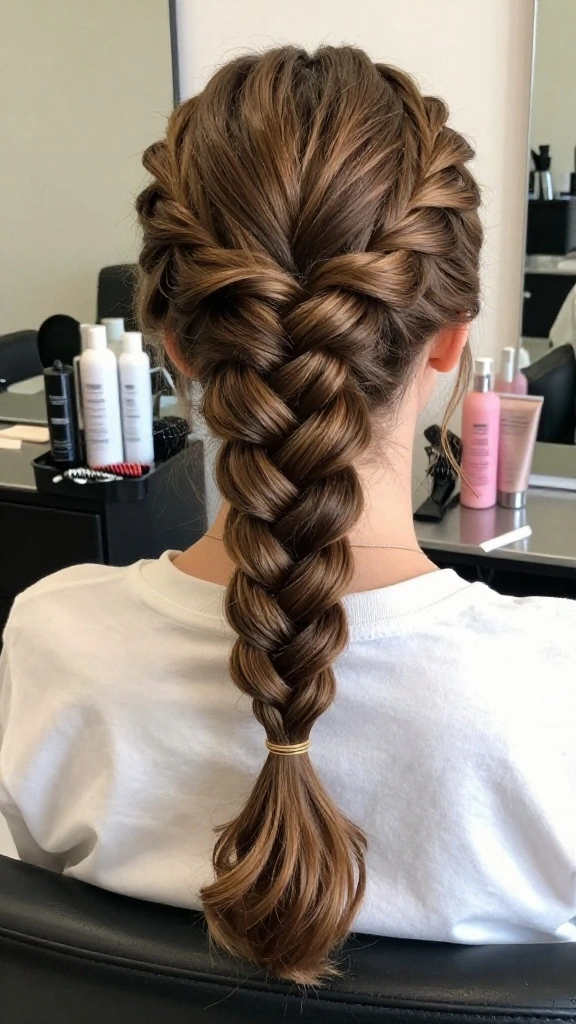
1. Classic French Braid Updo
The French braid remains the foundation for countless updo styles. Start by sectioning your hair into three equal parts at the crown. Cross the right section over the middle, then the left over the middle. As you continue braiding downward, add small sections of hair from each side. This creates the signature interlocking pattern that defines a French braid. Once you reach the nape of your neck, gather the remaining hair and secure it into a low bun. Use bobby pins to anchor the bun and smooth any flyaways with edge control. This style works beautifully for both casual and formal occasions.
2. Crown Braid Updo
A crown braid circles your head like a halo, creating an ethereal and romantic look. Begin by parting your hair down the middle from forehead to nape. Start a Dutch braid on one side, working horizontally across the back of your head. The Dutch braid sits on top of your hair rather than underneath, giving it dimension. Continue the braid until you reach the opposite side. Secure the end with a small elastic, then tuck it behind your ear or into a low bun. This style suits medium to long hair lengths and looks stunning with loose curls framing your face.
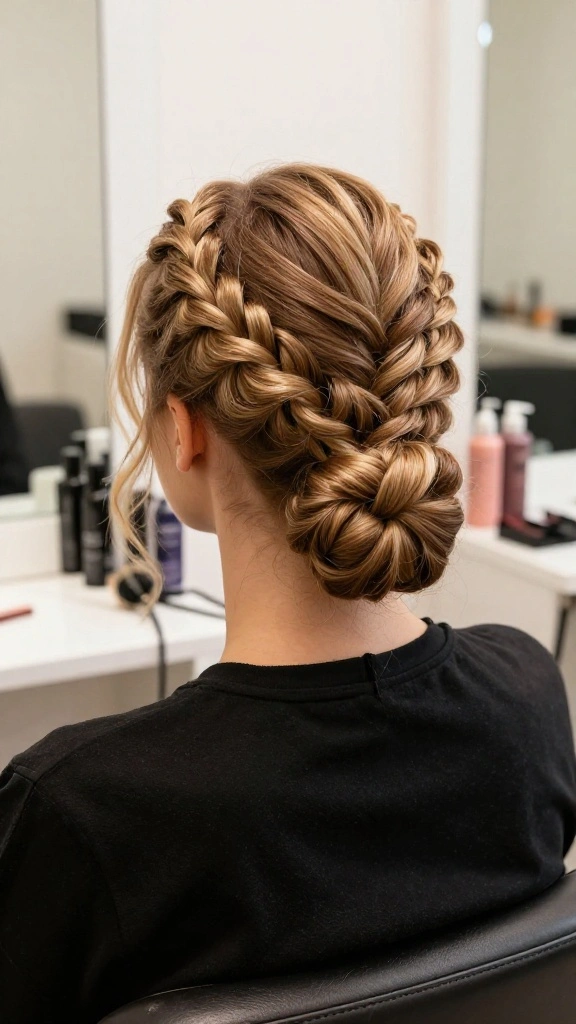
3. Twisted Bun with Braids
Combining twists and braids adds texture and visual interest to a simple bun. Divide your hair into two sections from the crown. Twist each section tightly as you move toward the back of your head. Once both twists meet, wrap them around each other to form a spiral. Gather all your hair into a low ponytail and twist it into a bun shape. Secure with bobby pins, then weave a thin braid around the base of the bun for added detail. This style holds well throughout the day and works on second or third day hair.
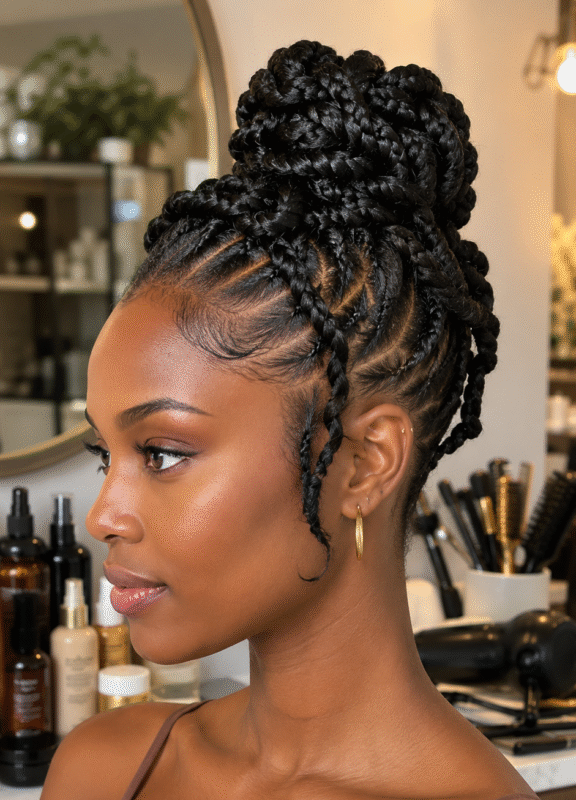
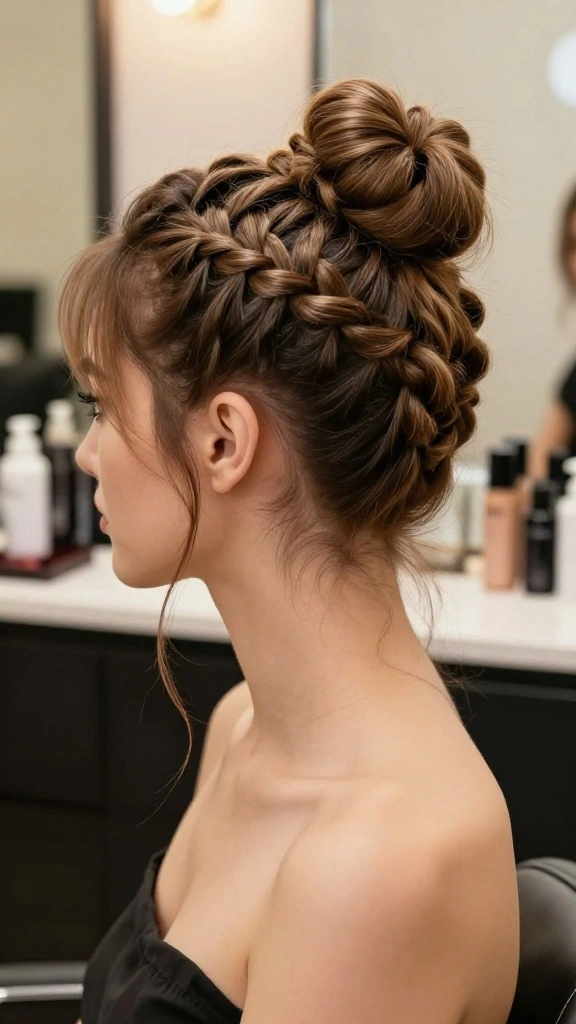
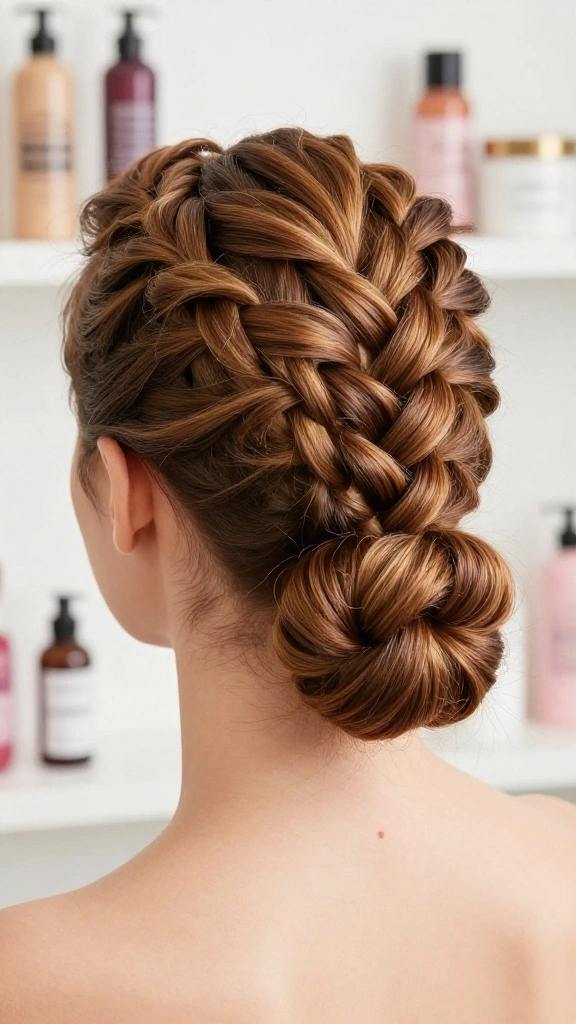
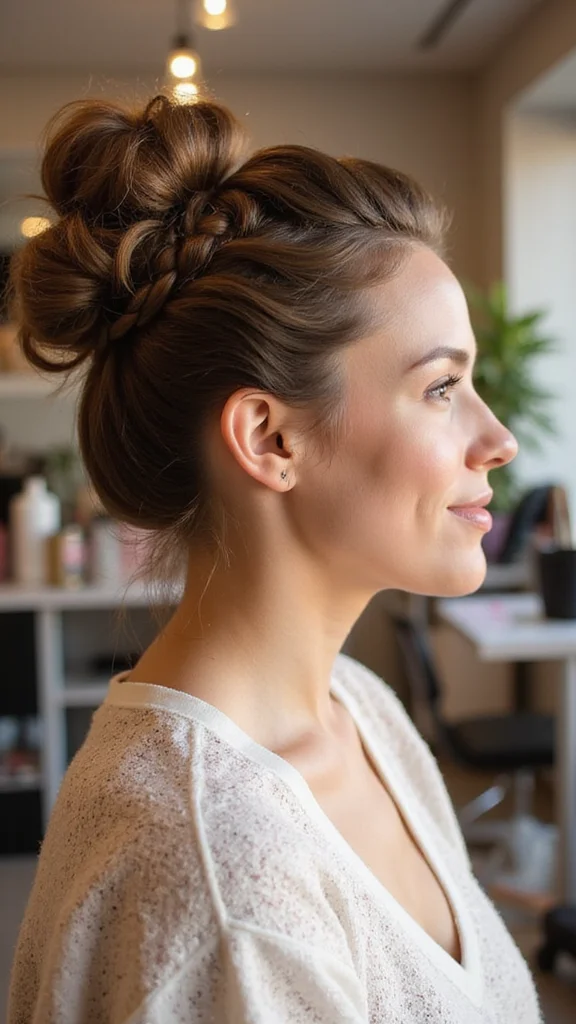
4. Braided High Bun
A high bun with braids offers a polished, put together appearance. Gather your hair into a high ponytail at the crown. Divide the ponytail into two or three sections. Braid each section loosely, leaving some texture and volume. Wrap the braids around the base of the ponytail to form a bun shape. Secure everything with bobby pins and finish with a light hairspray. The braids add dimension while the high placement elongates your neck. This style suits professional settings and special occasions equally well.
5. Box Braid Updo
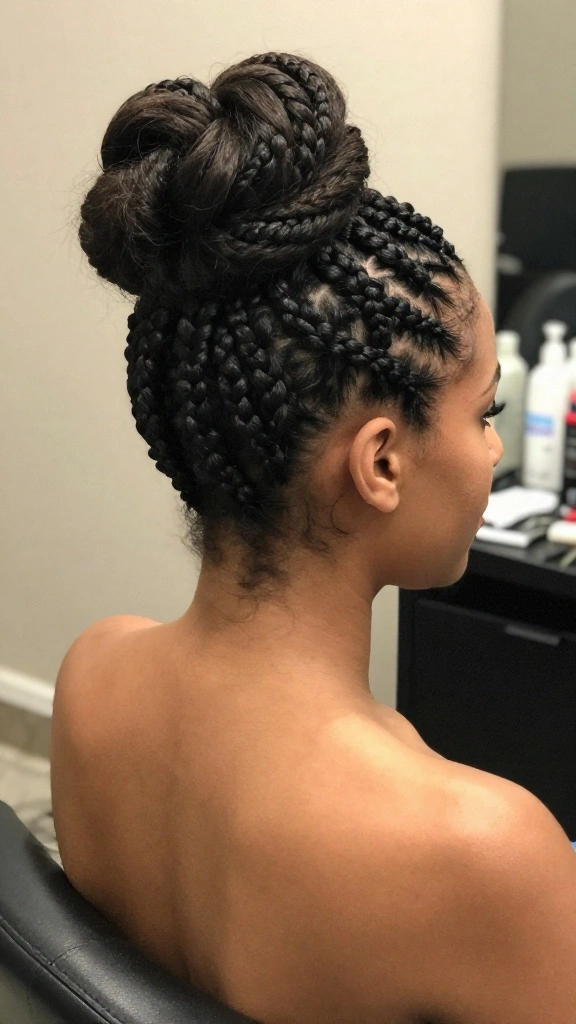
Box braids offer a protective style that transitions beautifully into an updo. If you already have box braids, gather them into a high or mid level ponytail. Twist the ponytail loosely and wrap it around itself to create a bun. Secure with bobby pins, allowing some braids to fall naturally for a relaxed vibe. Alternatively, you can create box braids specifically for this updo by sectioning your hair into square parts. Braid each section from root to tip, then style as described above. This look lasts for several days and requires minimal daily maintenance.
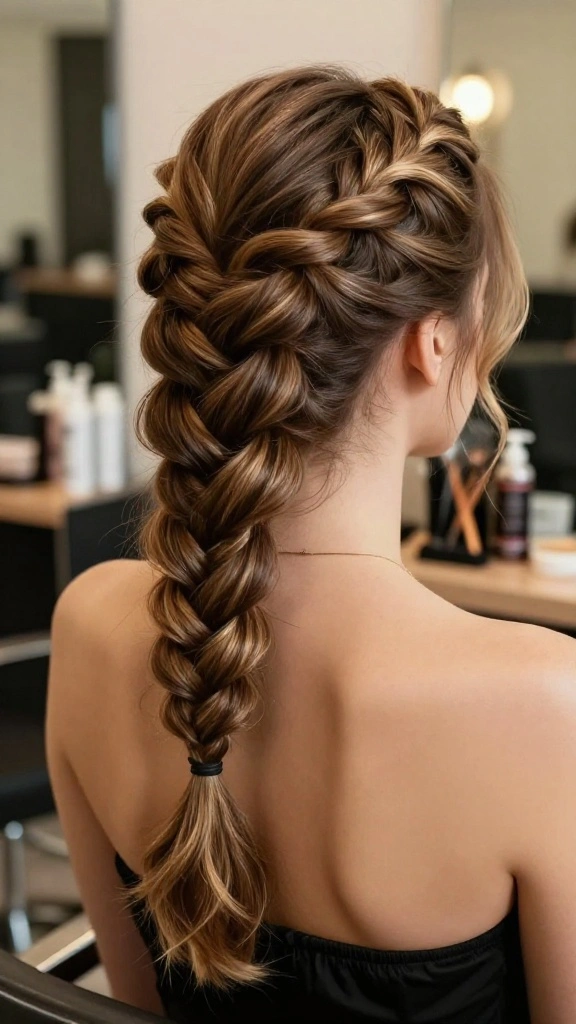
6. Fishtail Braid Updo
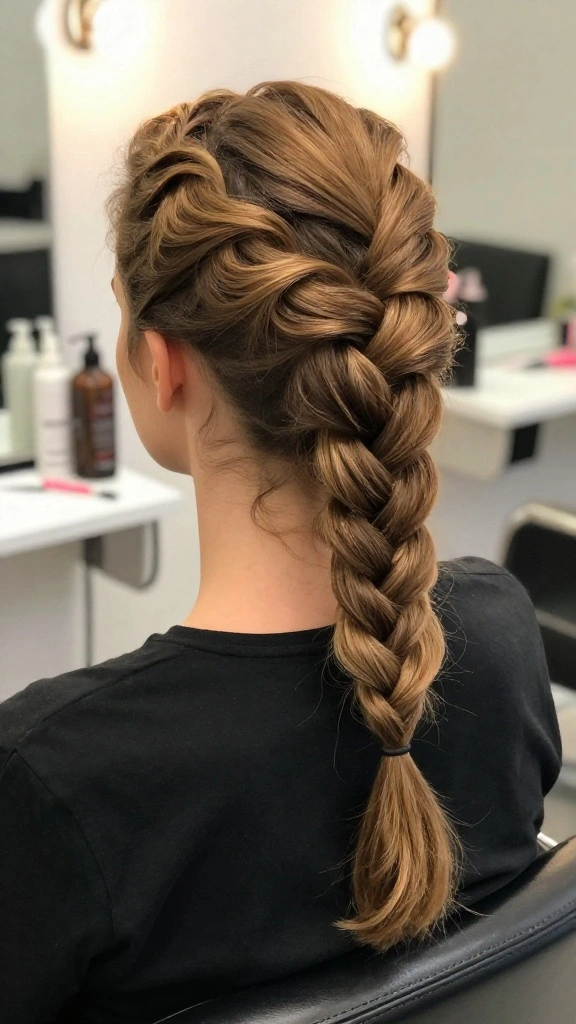
The fishtail braid creates an intricate, lacy appearance that looks more complex than it actually is. Divide your hair into two equal sections. Take a small piece from the outer edge of the right section and cross it over to the left section. Repeat on the opposite side, always taking from the outer edges. Continue this alternating pattern down the length of your hair. Once complete, gently pull the braid to loosen it and create a fuller texture. Wrap the braid into a bun at the nape of your neck. This style works wonderfully for date nights and celebrations.
7. Braided Ponytail Updo
A braided ponytail offers simplicity without sacrificing style. Gather your hair into a sleek or textured ponytail at your desired height. Divide the ponytail into two sections and create a two strand twist or braid. Wrap this braided section around the base of the ponytail to conceal the elastic. Secure with bobby pins and smooth the front sections with edge control. You can leave the ends of the ponytail loose for movement or curl them for added dimension. This style suits everyday wear and transitions seamlessly from day to evening.
8. Halo Braid Updo
A halo braid circles your entire head, creating a crown like effect. Start by taking a section of hair from one side of your head near the temple. Create a Dutch braid that travels around the back of your head to the opposite temple. The braid should sit close to your scalp, following the natural curve of your head. Once the braid reaches the other side, secure the end with bobby pins. Gather any remaining hair into a low bun or ponytail at the nape. This style suits all hair lengths and creates a sophisticated, bridal quality appearance.
9. Micro Braids Updo
Micro braids offer a protective style with endless updo possibilities. Create multiple thin braids throughout your hair, sectioning carefully to ensure even sizing. Once all braids are complete, gather them into a high or mid level ponytail. You can leave the braids loose for a bohemian feel or twist them together for a more structured look. Secure with bobby pins and add decorative hair cuffs or beads if desired. This style protects your natural hair while allowing creative styling flexibility.
10. Dutch Braid Updo
The Dutch braid sits on top of your hair, creating a raised, three dimensional effect. Begin at the crown and divide your hair into three sections. Cross the right section under the middle, then the left under the middle. This underhand motion creates the signature raised appearance. Continue braiding down the back of your head, adding hair as you go. Once you reach the nape, secure the braid and gather all hair into a low bun. The Dutch braid adds visual interest and works beautifully as a statement style.
11. Braided Bun with Curls
Combining braids with loose curls creates romantic, textured elegance. Create one or two braids starting from the crown and moving toward the back. Gather all your hair, including the braids, into a low bun at the nape. Secure with bobby pins, then gently pull sections of the bun to create a fuller, more relaxed shape. Leave some hair out around your face and curl it with a curling iron or by finger coiling. This style suits weddings, date nights, and any occasion calling for softness and femininity.
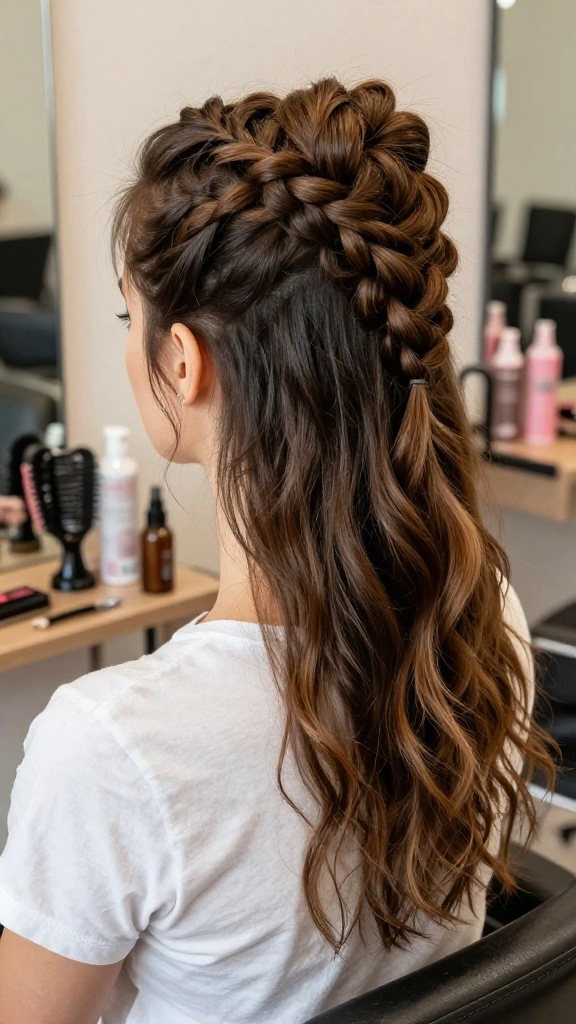
12. Braided Half Updo
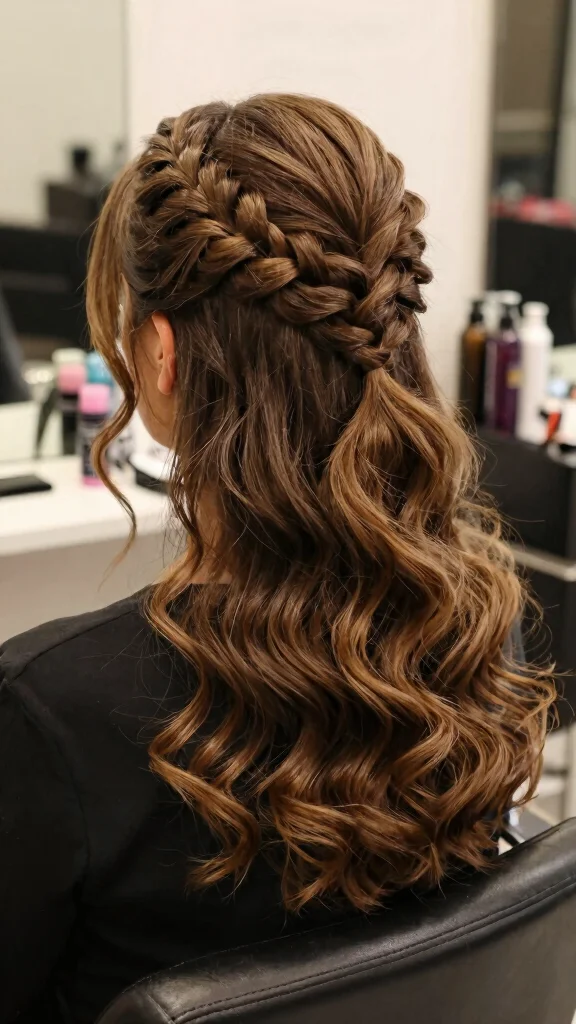
A half updo keeps hair off your face while maintaining length and movement. Take a section of hair from each temple and create two thin braids. Bring these braids to the back of your head and secure them together with bobby pins. Leave the remaining hair down, creating a half up, half down effect. You can curl the loose hair for added dimension or leave it straight for a sleeker appearance. This style suits casual outings and works well on second day hair.
13. Braided Waterfall Updo
A waterfall braid creates the illusion of hair flowing like water. Start with a section of hair at the temple and begin a Dutch braid. As you braid, drop one section of hair and pick up a new section from above. This creates the waterfall effect. Continue this pattern around the back of your head. Secure the braid and gather all hair into a low bun or ponytail. The dropped sections create beautiful cascading layers. This style suits all occasions and looks especially striking with color or highlights.
14. Knotless Braids Updo

Knotless braids offer a gentler alternative to traditional box braids. Create knotless braids by feeding hair into the braid rather than tying knots at the base. Once your braids are complete, gather them into a high or mid level ponytail. Twist or braid the ponytail and wrap it around itself to form a bun. Secure with bobby pins and adjust for a polished or relaxed appearance. This protective style minimizes tension on your hairline while offering versatile styling options.
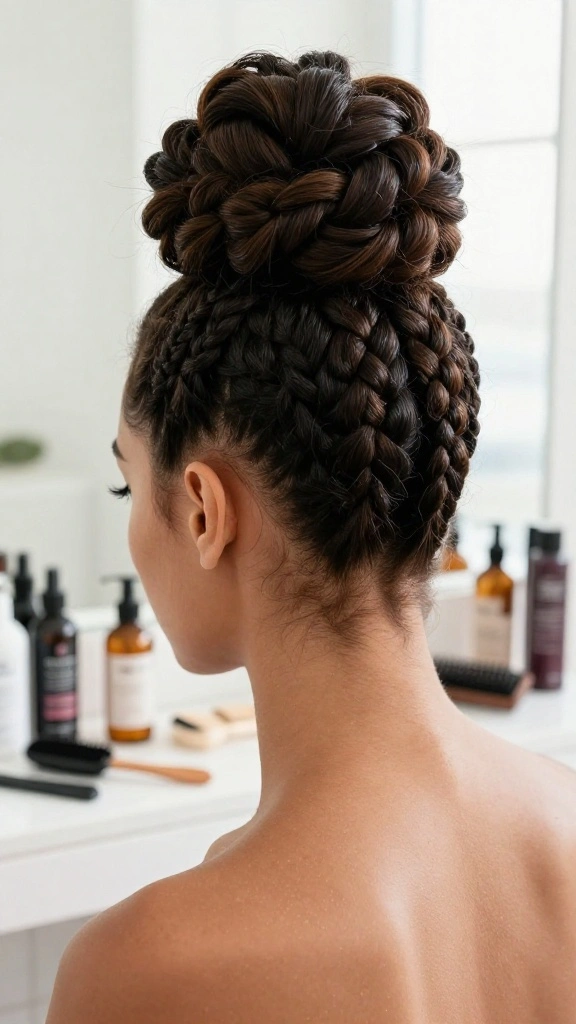
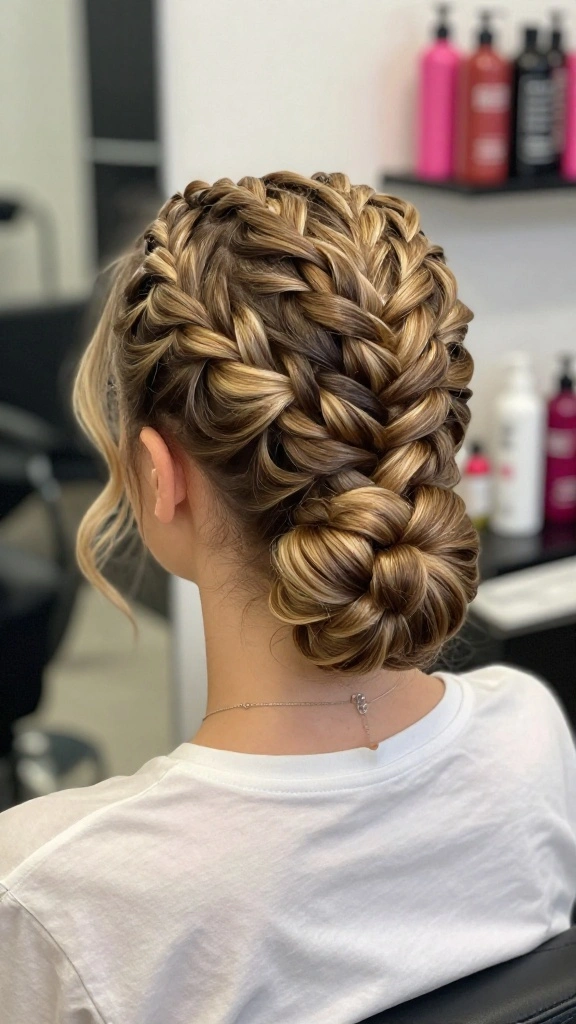
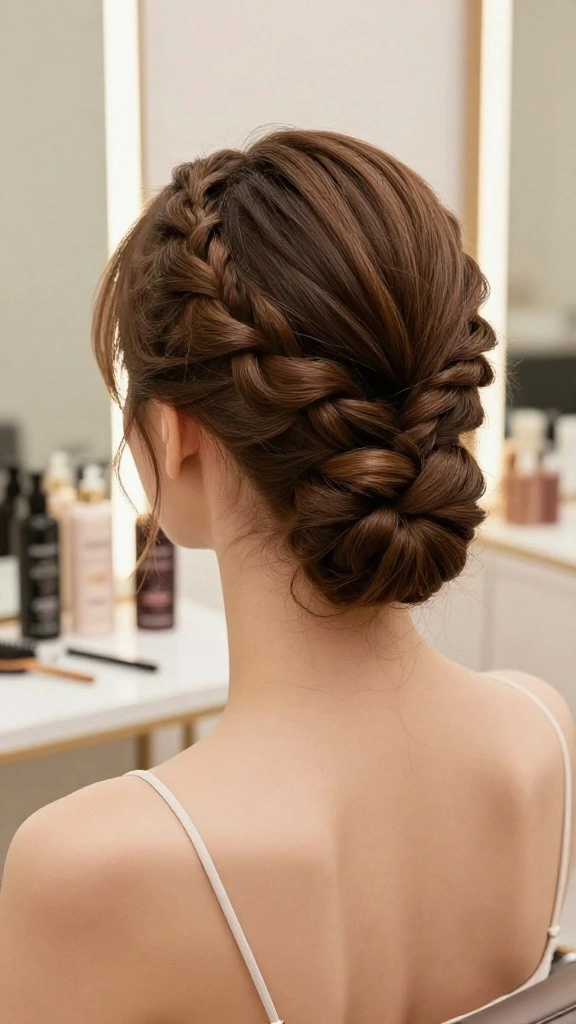
15. Braided Chic Bun
A chic braided bun combines sophistication with texture. Create two or three braids starting from the crown and moving toward the back. Gather all your hair into a high or mid level ponytail. Twist the ponytail and wrap it around itself, incorporating the braids into the bun shape. Secure with bobby pins and smooth the front sections with edge control for a polished finish. This style suits professional environments and formal events. The braids add visual interest while maintaining a neat, put together appearance.
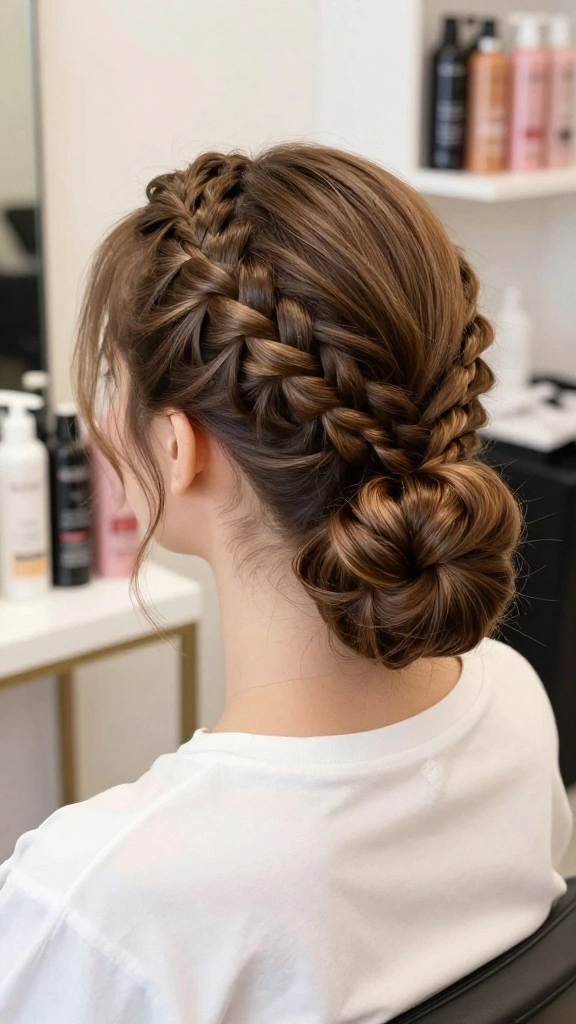
16. Elegant Braided Chignon
A chignon represents classic elegance with a braided twist. Gather your hair into a low ponytail at the nape of your neck. Create a braid with the ponytail, then coil the braid around itself to form a compact bun. Secure with bobby pins and smooth any flyaways. You can add a decorative hair stick or comb for an extra touch of sophistication. This style suits formal occasions, professional settings, and anyone seeking timeless elegance. The low placement flatters most face shapes and works beautifully with updos.
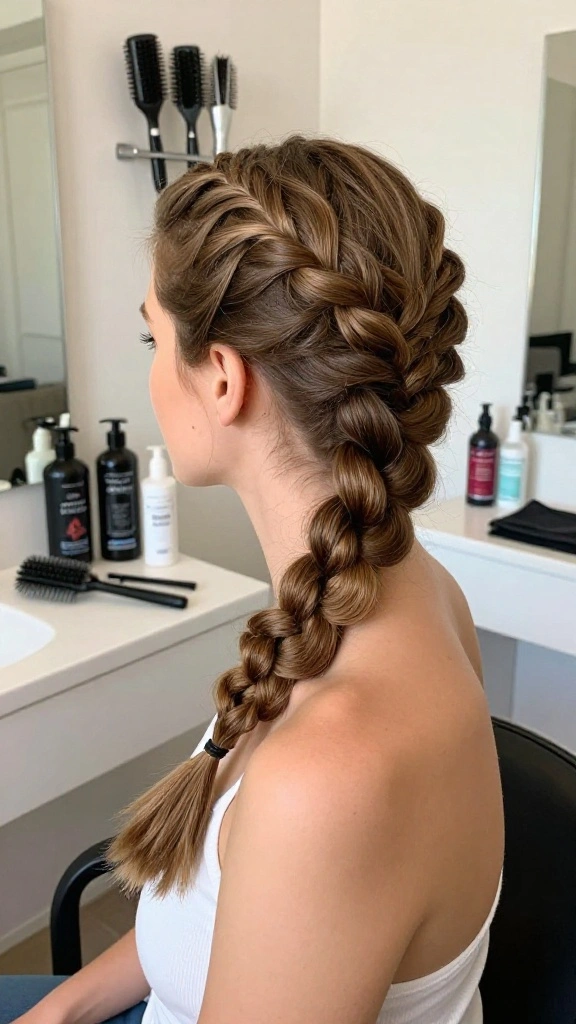
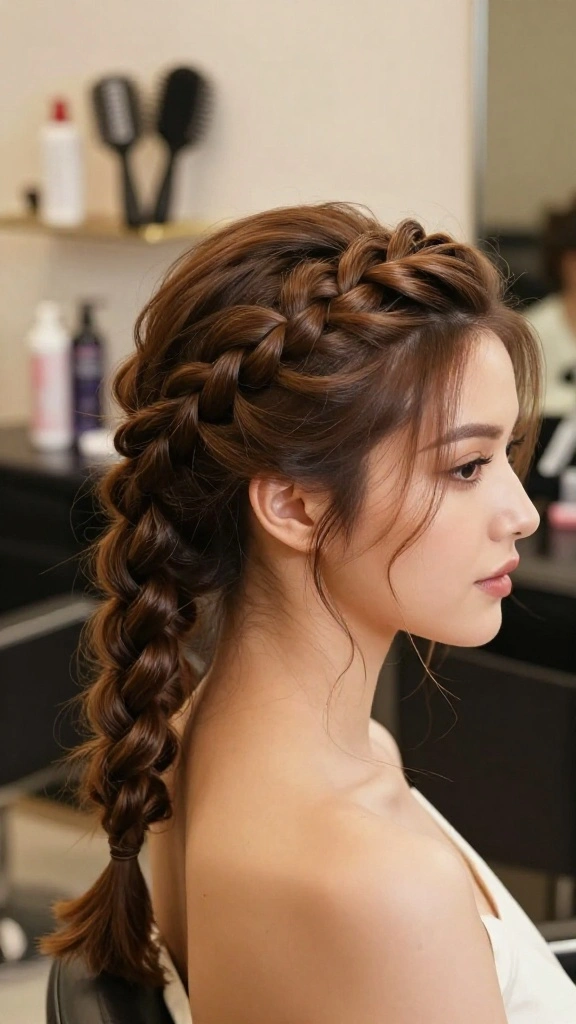
17. Side Braid Updo
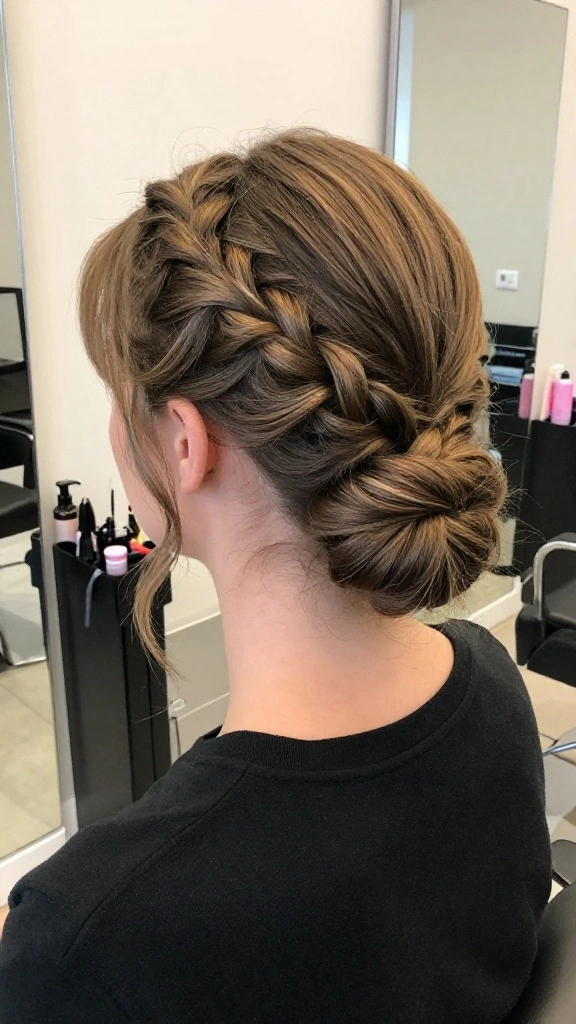
A side braid updo offers asymmetrical style and movement. Create a braid starting from one side of your head, working toward the opposite side. The braid can be a French, Dutch, or fishtail variation depending on your preference. Once the braid reaches the back, gather all your hair and secure it into a low bun on the opposite side. The braid wraps around the bun, creating visual interest and dimension. This style suits casual and dressy occasions equally well.
18. Finishing Touches and Maintenance
Proper finishing ensures your braided updo lasts throughout the day. Use bobby pins that match your hair color for a seamless appearance. Secure braids and buns with multiple pins, crisscrossing them for stability. Apply edge control to your hairline and any flyaways for a polished look. A light hairspray holds everything in place without creating crunchiness. For overnight wear, wrap your updo loosely in a silk or satin scarf to maintain the style and protect your hair. Refresh your updo the next day by gently re pinning any loose sections. With proper care, most braided updos last two to three days before requiring a full redo.