
Thick hair can feel heavy and shapeless without the right cut. A medium layered haircut transforms dense strands into a style with movement, texture, and bounce. Layers remove bulk while keeping length, and when styled with a blowout technique, they create volume that looks effortless and polished.
This guide walks you through what makes a medium layered cut work for thick hair, how professionals execute the cut, and the styling methods that bring out maximum dimension. You’ll learn the tools, products, and daily maintenance tips that keep your layers looking fresh between salon visits. Whether you’re considering this cut or already have one, these insights will help you achieve salon quality results at home.
The blowout style amplifies the benefits of layering. Strategic drying with a round brush lifts the roots and separates each layer, creating a fuller silhouette. The combination of a skilled cut and proper styling technique gives thick hair the control and elegance it deserves.
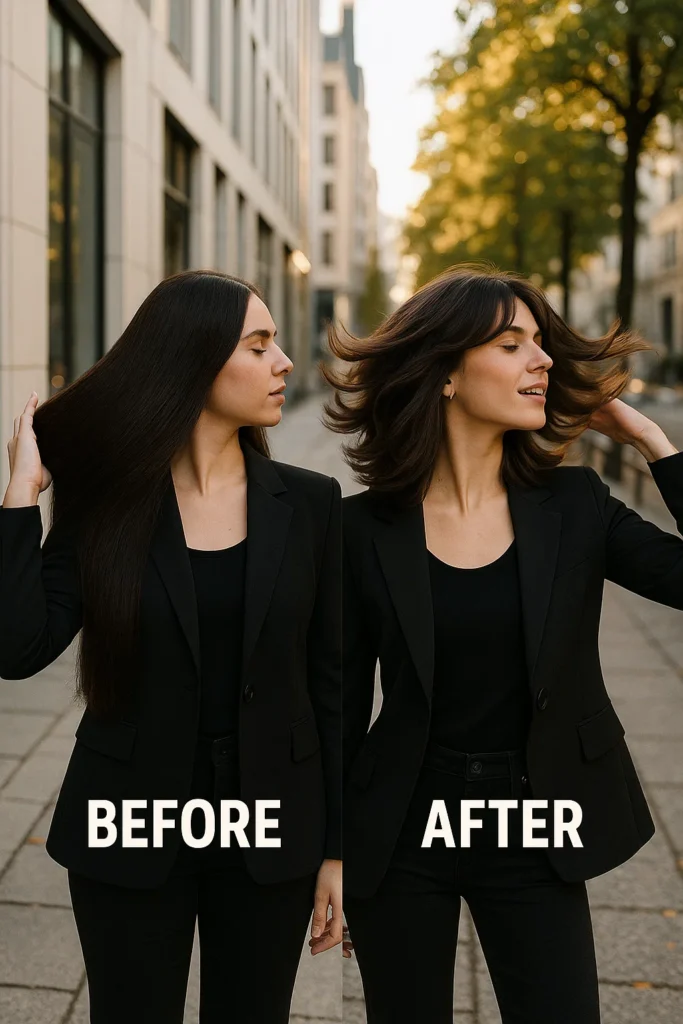
The Transformation: Before and After Layering
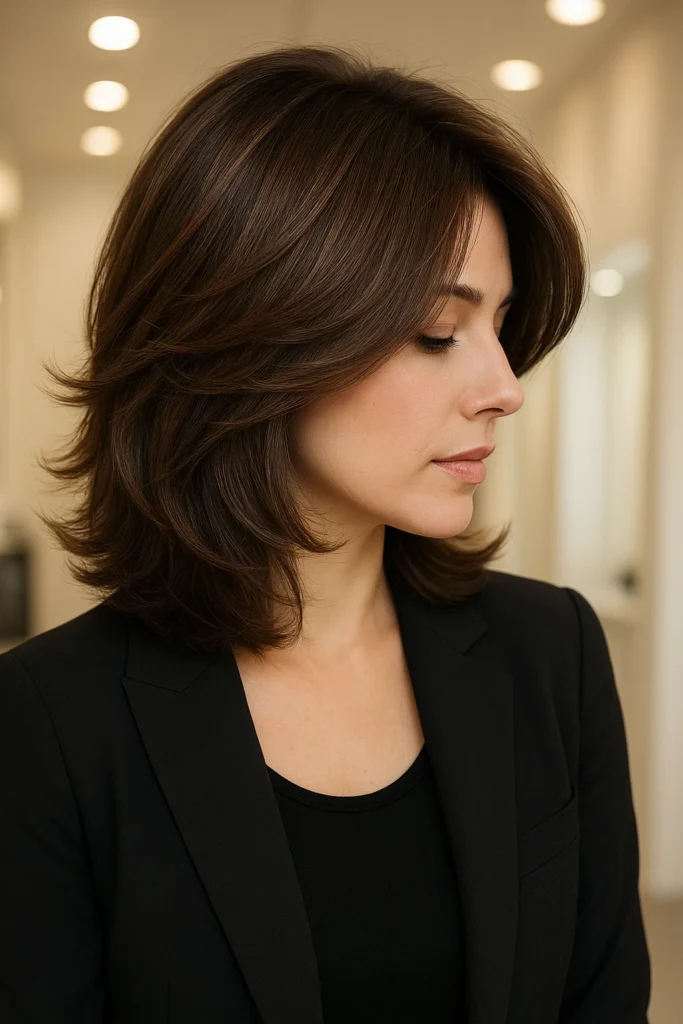
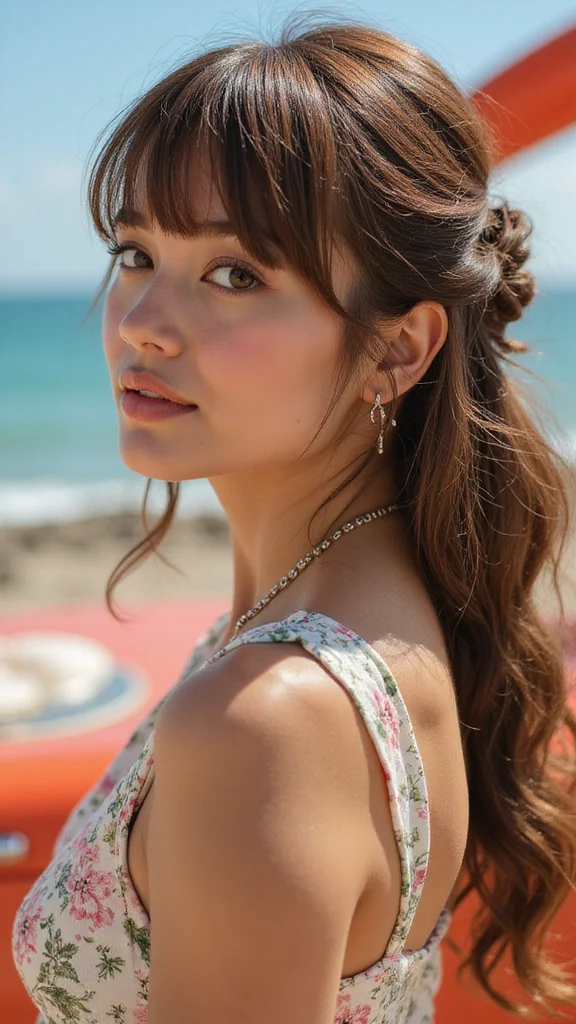
Shoulder-length layered hair creates a sophisticated silhouette that works for multiple face shapes and hair types. The length is practical for everyday wear while the layers add personality and dimension. This length avoids the awkward in-between stage that shorter cuts sometimes create.
When layers are cut correctly, they frame the face with shorter pieces that draw attention to your features. The longer layers underneath provide fullness and weight at the ends, preventing the hair from looking thin or wispy. This balance is especially important for thick hair, which can appear overwhelming without strategic layering.
The blowout style amplifies these benefits. Dried with proper technique, each layer separates and moves independently. The result is a hairstyle that looks expensive and intentional, not accidental. This is the look that makes people ask what you changed about your appearance.
Thick Hair Without Layers: The Starting Point
Uncut thick hair tends to sit flat against the head, especially at the crown where weight pulls everything down. Without layers, the hair mass creates a dense appearance that can look dated or unflattering. The bulk concentrates at the ends, making the overall shape feel bottom-heavy.
Many people with thick hair avoid cutting because they fear losing length or creating frizz. This hesitation often leads to years of wearing the same one-length style, even when it no longer serves them. The truth is that strategic cutting actually improves thick hair’s appearance and manageability.
Uncut thick hair also takes longer to style and requires more product to achieve any texture or movement. The density makes blow-drying tedious, and the weight fights against any volume you try to create. Layers solve this problem by reducing the amount of hair that needs to be dried and styled.
The Professional Cutting Process
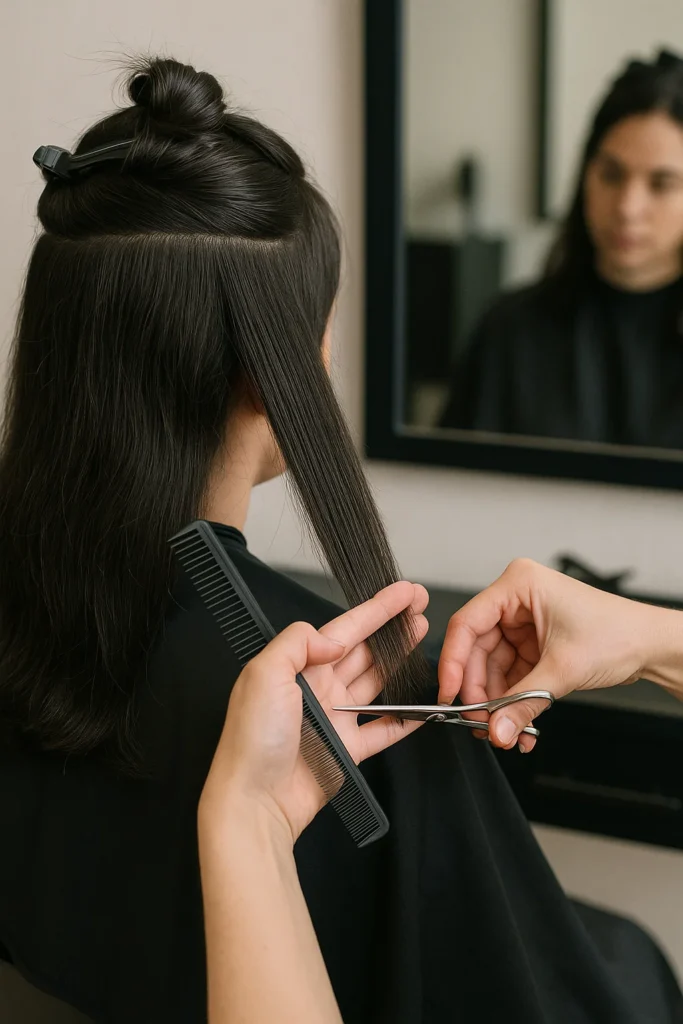
A skilled stylist approaches thick hair with precision and intention. The cutting process begins with a consultation about your lifestyle, styling habits, and desired outcome. This conversation informs how many layers to cut and where to place them for maximum benefit.
The stylist typically works with damp hair, cutting at specific angles to create the graduated effect. For thick hair, the angle matters tremendously. Cutting at too steep an angle can create too much graduation and make the hair look choppy. A gentler angle maintains cohesion while still removing bulk.
The stylist also considers how the layers will look when blown out versus air-dried. A cut that looks good wet might not translate to your daily styling routine. Experienced stylists cut with the final blowout style in mind, ensuring that each layer falls into place when you use heat and a round brush.
During the cutting process, the stylist may use point-cutting or slide-cutting techniques to remove weight while maintaining shape. Point-cutting involves holding the scissors vertically and cutting into the hair, creating texture and removing bulk without creating harsh lines. Slide-cutting uses the scissors to glide along the hair shaft, creating a softer graduation. Both techniques serve different purposes, and a skilled stylist knows which to use where.
Styling Products for Thick Layered Hair
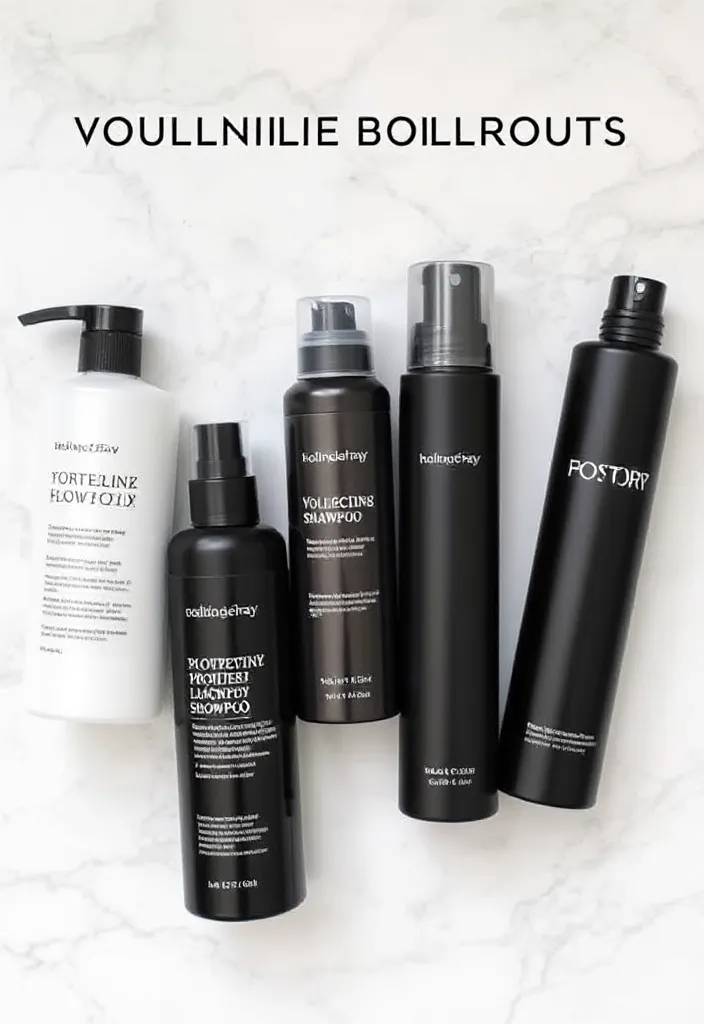
The right products make the difference between a good blowout and a great one. A volumizing mousse applied to damp roots lifts the hair at the base, creating height that lasts through the day. Mousse is lighter than cream products, so it won’t weigh down thick hair.
A heat protectant spray is essential before blow-drying. This product shields each strand from damage and helps the style hold longer. For thick hair, a lightweight heat protectant works best, as heavy formulas can leave residue that dulls shine.
A texturizing spray or dry shampoo applied mid-style adds grip and separation between layers. This product is applied after blow-drying and helps each layer maintain its distinct shape. The texture also prevents the style from looking too polished or stiff, keeping it modern and wearable.
Beyond these essentials, consider a lightweight serum for the ends. This product adds shine and smoothness without weighing down the roots. Apply it sparingly to the mid-lengths and ends, avoiding the crown area where you want maximum lift. A serum also helps prevent frizz and flyaways, keeping your blowout looking polished throughout the day.
The Blowout Technique with a Round Brush
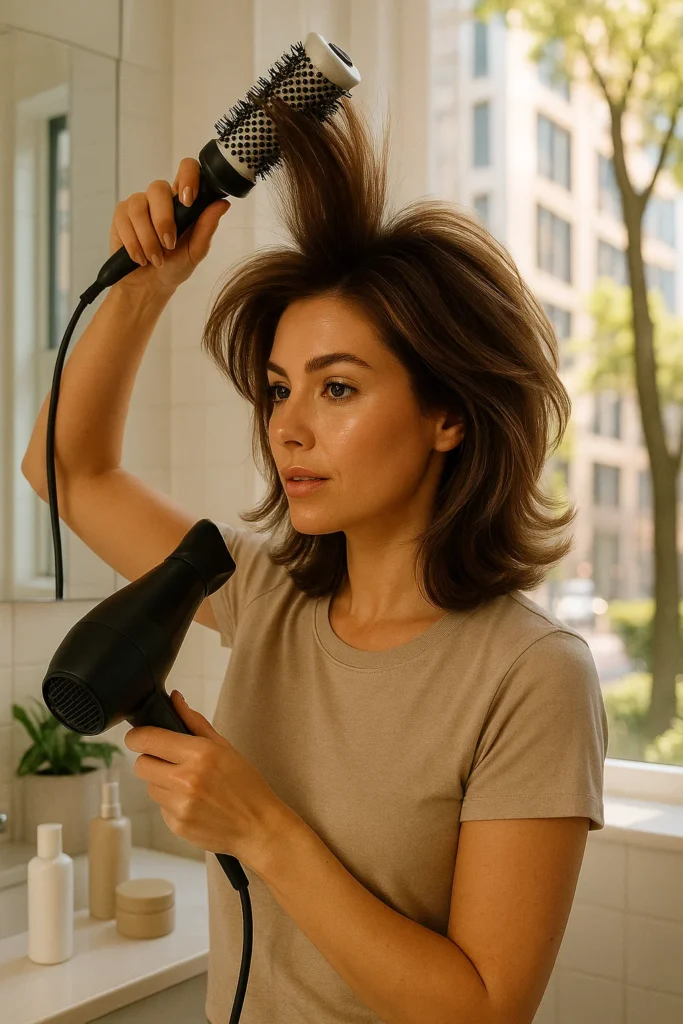
The round brush is your most important tool for creating a voluminous blowout. A large diameter brush (two to three inches) works best for thick hair, as it can grip more hair and create bigger waves. The brush lifts the roots while the blow dryer’s heat sets the shape.
Start by applying mousse to damp roots and combing through. Divide the hair into sections, clipping up the top layers. Begin with the bottom sections, using the brush to lift the hair away from the scalp. Direct the blow dryer nozzle downward along the hair shaft, which smooths the cuticle and adds shine.
Work through each section methodically, spending extra time at the roots where you want the most lift. Once the roots are dry, run the brush through the mid-lengths and ends to create waves and movement. The key is patience. Rushing the process results in a flat, lifeless style.
The technique involves rolling the brush away from your face as you dry. This creates a wave pattern that looks flattering and modern. For the sides, roll the brush backward, which creates volume and movement. For the back, alternate the direction of the rolls to create a natural, undone appearance.
Creating Volume at the Crown

The crown is where most people want maximum volume, especially with thick hair. This area sets the tone for the entire style. To create lasting height, blow-dry the crown section against the direction of growth, lifting the roots straight up.
Use the round brush to roll the hair upward and away from the face. Hold the brush in place while the blow dryer cools the hair, which sets the shape. This cooling step is crucial. Heat sets the temporary shape, but cool air locks it in place for hours.
Once the crown is dry, you can release the tension and let the hair fall naturally. The roots will stay lifted because they’ve been set in that position. This technique works for all hair types but is especially effective for thick hair, which holds a set well.
For maximum crown volume, consider using a blow dryer with a concentrator nozzle. This attachment directs the airflow precisely, allowing you to focus heat on the roots without disturbing the rest of the hair. The concentrator also helps smooth the cuticle, adding shine and reducing frizz.
Finishing Touches and Texture

After the blow-dry is complete, apply a texturizing spray to add grip and separation. Spray it throughout the mid-lengths and ends, then use your fingers to tousle the hair and break up any uniformity. This step prevents the style from looking too stiff or overdone.
A light hairspray applied as a final step holds the style without making it feel crunchy or heavy. For thick hair, use a flexible hold formula that allows movement. Spray it from about eight inches away, using a light hand to avoid product buildup.
The finished blowout should look effortless, with each layer visible and moving independently. The crown has lift, the face-framing pieces have movement, and the overall shape is polished but not rigid. This is the look that makes the medium layered cut shine.
To enhance texture further, try using a curling iron on the ends of each layer. A one-inch barrel works well for creating soft waves that complement the layered cut. Curl away from the face on the front sections and alternate directions on the back for a natural appearance. These waves add dimension and help the layers stand out more distinctly.
Maintenance and Long-Term Care

Between salon visits, maintain your layered cut with proper care. Wash your hair in cool water, which helps seal the cuticle and adds shine. Use a sulfate-free shampoo and conditioner designed for thick or textured hair, as these formulas won’t weigh you down.
Deep condition once a week to keep the ends healthy and prevent split ends from traveling up the hair shaft. Thick hair can handle richer conditioners, so don’t be afraid to use a generous amount on the mid-lengths and ends. Leave it on for at least five minutes for maximum benefit.
Schedule trims every six to eight weeks to maintain the shape and keep the layers looking intentional. Regular trims also prevent split ends from making the hair look dull and damaged. A good stylist will refresh the layers without removing too much length, keeping your style consistent between visits.
On non-wash days, use dry shampoo to refresh your blowout and add texture. Spray it at the roots and massage it in with your fingers. Dry shampoo absorbs excess oil and adds grip, making it easier to restyle your hair without washing. This extends the life of your blowout and keeps your style looking fresh longer.
Consider using a silk or satin pillowcase to protect your hair while sleeping. These materials create less friction than cotton, reducing frizz and breakage. A silk pillowcase also helps your blowout last longer, so you can go more days between washes without your style falling flat.

Leave a Reply