Discover 20 stunning sandy chic beach nail designs that are perfect for summer. From neutral tones to shimmery seaside styles, these nails will turn heads and complete your beach look.
Ready to turn heads this summer? Your beach look isn’t complete without nails that scream sunshine and style. From sandy neutrals to shimmering seashell finishes, Sandy Chic is the nail trend making waves. Whether you’re sipping cocktails on the coast or snapping seaside selfies, these 20 stunning beach nail designs are guaranteed to impress—bold, breezy, and irresistibly cool. Let’s dive into the ultimate coastal-inspired nail inspiration.
Are “Sandy Chic” Nails Actually a Good Idea for Summer?
Okay, let’s be real. Every summer, a new nail trend pops up, promising to be the one. This year, it’s all about “sandy chic.” I know, I know. It sounds like a scented candle from a discount store, but hear me out.
So, what are we actually talking about here? It’s not about gluing actual sand to your fingers. Thank god. For me, it basically boils down to taking the best parts of a beach day—that gritty but soft texture, the muted colors of dunes, maybe a little pearly shimmer from a seashell—and putting it on your nails. Think less “neon pink flamingo” and more “classy, windswept artist who lives in a beachfront cabin.” The whole pitch is that it looks cool without trying too hard. We’ll see about that.
But is it actually any good? Here’s the breakdown.
The good news is, “sandy chic” isn’t a one-trick pony. You can go super minimalist with just a matte, sandy-textured nude that honestly looks good on anyone. It’s sophisticated. Or, if you’re feeling a little extra, you can add a tiny, subtle seashell decal or the whisper of a palm tree. Your call. It’s not forcing you into some crazy design you’ll hate in a week.
And get this: it actually works for more than just a beach party. Is it “perfect for every occasion”? Let’s not get carried away. But because it’s usually based on neutrals, it doesn’t clash with your work outfit or what you’re wearing to a nice dinner. It’s like the white t-shirt of manicures. It just… works.
The Ultimate Guide to Sandy Chic Beach Nail Colors
- The Obvious Choice: Nudes and Beiges
Yeah, yeah, the color of sand. Groundbreaking. But here’s the thing: this is your safe bet. It’s the ‘I have my life together’ shade that won’t clash with your work outfit or your happy hour drink. It’s chic, it’s muted, and best of all, when it inevitably chips, it’s not screaming for attention. It just sort of… fades. A win for lazy people everywhere. - For When Beige is Too Boring: Soft Pinks & Corals
If the thought of another beige manicure makes you want to nap, this is your next move. But we’re not talking about that radioactive coral from 2014. No. Think less ‘bubblegum’ and more ‘the inside of a perfect conch shell’ or ‘that perfect shade of an Aperol Spritz’. It’s color, but with the volume turned way down. It says “summer” without shouting it through a megaphone. - The “I’d Rather Be Swimming” Shades: Turquoise & Seafoam
Now we’re getting into slightly more dangerous territory. Can this go wrong? Absolutely. You’re one shade away from looking like you had a run-in with a bottle of Listerine. But here’s the potential upside: when you get it right—a dusty, muted seafoam or a pale, milky turquoise—it’s genuinely cool. It’s a statement, but a quiet one. Just… proceed with caution. - The High-Maintenance Classic: Soft White
Ah, the crisp white nail. A summer staple. The goal here is less ‘Wite-Out on your fingertips’ and more ‘the delicate foam washing up on the shore’. It looks clean, sharp, and amazing with a tan. But let’s be real. Unlike the beiges that hide every flaw, a chip on a white nail is like a siren. It demands to be seen. So, choose this one only if you’re prepared for the upkeep. - And If You Must: A Touch of Shimmer
Look, someone was going to suggest glitter. If you absolutely have to add some sparkle, for the love of god, be subtle. This isn’t a New Year’s Eve party. We’re talking about a fine, pearly shimmer mixed into a nude polish that just catches the light. Think ‘sun reflecting on wet sand,’ not ‘a mermaid sneezed on your hands.’ There’s a big difference.
So, basically, the whole color game is about looking like you just effortlessly emerged from some tasteful, minimalist beach. No neons. No loud nonsense. Just pick a color that won’t make you cringe in a week and go enjoy your summer. What a concept.
Trendy Designs for Sandy Chic Beach Nails
Sandy chic beach nails aren’t just about color—they’re also about creating stunning designs that reflect the fun and carefree spirit of the beach. Below are some of the trendiest designs to inspire your next manicure:
-
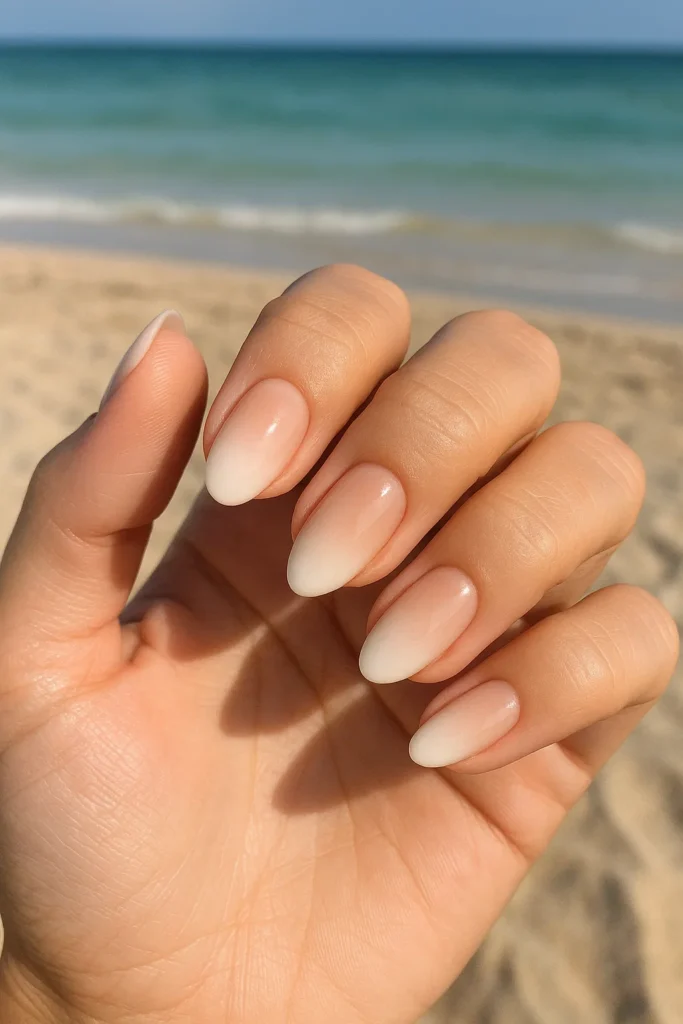
Ombré: The safe bet. A simple sand-to-sea fade. It’s nail art for people who are scared of actual art. It’s fine. Moving on.
-
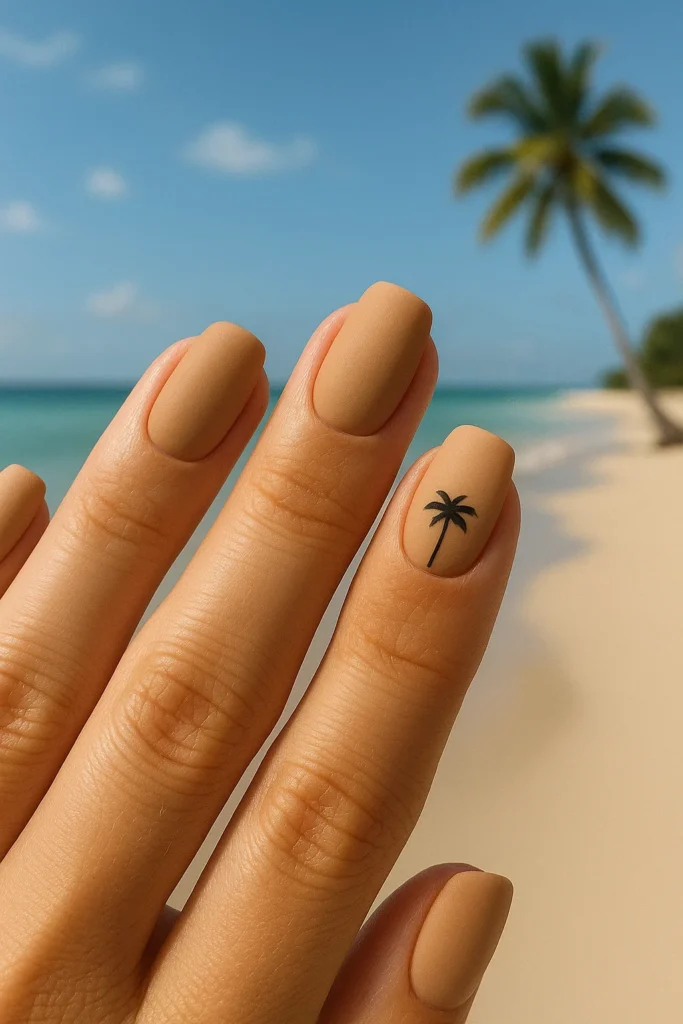
Palm Trees: Hard pass. Unless you want your nails to scream “I bought a souvenir keychain.” If you absolutely must, one finger only. Max.
-
Seashells & Starfish: This is a trap. You’re one step away from a craft store disaster. Think a single, tiny, painted shell. Anything 3D is a cry for help.
-
Glitter: Danger zone. You want a whisper of shimmer, not a fistful of party glitter. Think “sun on wet sand,” not “a mermaid sneezed on your hand.”
-
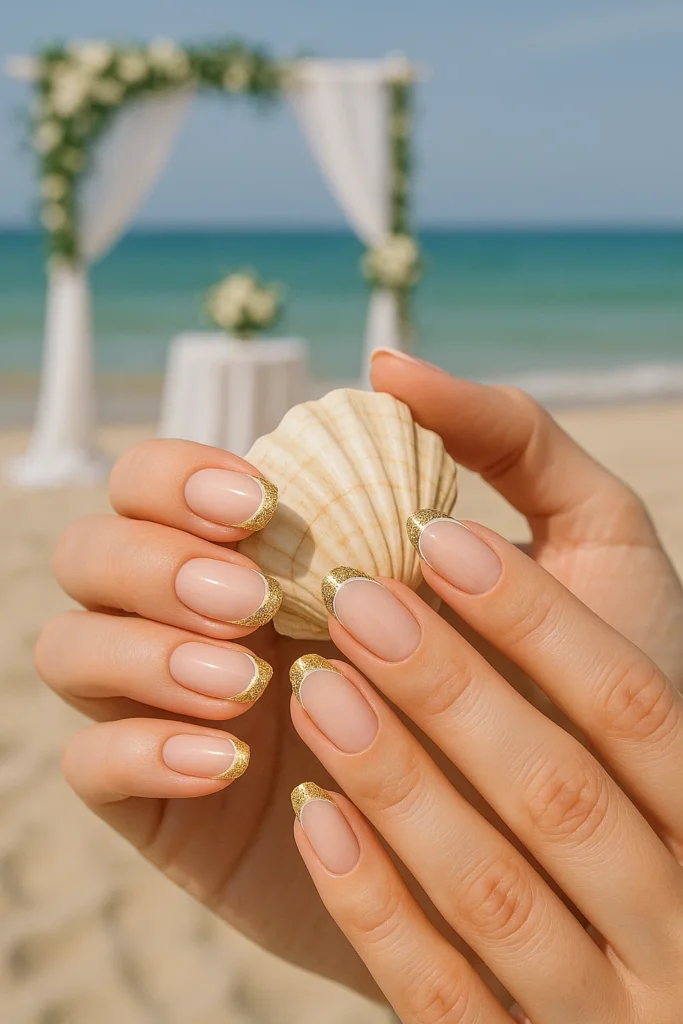
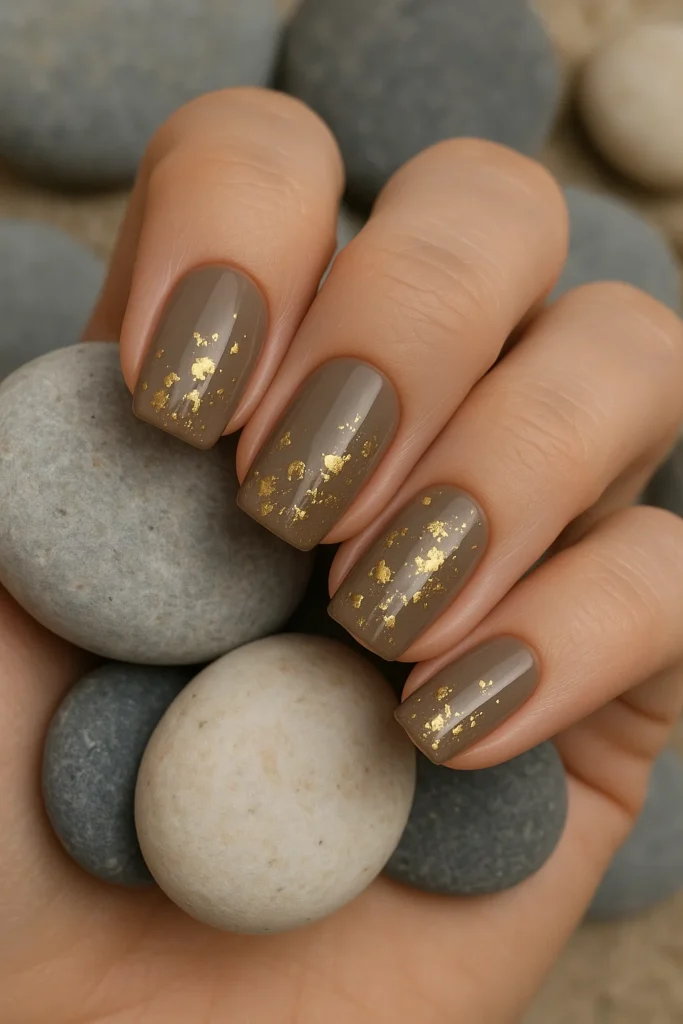
Gold Foil: This is the one. A few flecks on a nude nail. It looks expensive. It looks intentional. It’s the only design that says “style” instead of “vacation.” Do this one.
These designs range from subtle to bold, so you can pick one that suits your style and mood for the day!
How to Achieve the Perfect Sandy Chic Beach Nails at Home
Getting the perfect sandy chic beach nails at home is possible with a little patience and the right tools. Here’s how to create your own beach-inspired manicure:
Step 1: Get Your Gear
Don’t even start unless you have this stuff.
-
Base & Top Coat: Non-negotiable. Don’t be an animal.
-
Your Color: That “perfect” beige or dusty pink you spent 45 minutes choosing.
-
A Tiny Brush: For your artistic ambitions. We’ll see how that goes.
-
Nail Stickers (The Real MVP): Let’s be honest, this is probably what you should be using. This is your safety net for when your “palm tree” ends up looking like a sad green smudge.
-
Cuticle Oil: To fake looking like you have your life together at the end.
Step 2: The Boring-But-Necessary Prep
Yeah, I know. It’s a drag. But if you want this to last more than 24 hours, you have to do it. Clean up your nails. File them. Push back your cuticles. And for the love of god, use the base coat. It’s the difference between a decent manicure and yellow, stained nails.
Step 3: Lay the Groundwork
Slap on your base color. Two coats. And here’s the hardest part of the entire process: actually wait for each coat to dry. Don’t touch anything. Don’t check your phone. Sit on your hands if you have to. If you mess this up, just give up now.
Step 4: The Moment of (No) Truth: The “Art”
Okay, deep breath. This is where it all goes wrong. You can grab that tiny brush and try to freehand a delicate seashell. How’s your inner Picasso feeling? Confident? Or you can do the smart thing: use a sticker. Seriously. No one will know. It’s a much safer bet than explaining why you have a weird black blob on your ring finger.
Step 5: Seal the Deal
If you’ve made it this far without a major disaster, congratulations. Now, lock it all in with a top coat. Be generous. This is the magic shellac that will protect your questionable art from the harsh realities of life, like doing dishes or opening a can of seltzer. A little cuticle oil at the end makes it all look professional.
Top Nail Care Tips for Sandy Chic Beach Nails
Taking care of your sandy chic beach nails is crucial, especially when you’re constantly exposed to water, sand, and sun. Here are some essential nail care tips to keep them looking their best:
- Hydrate Your Cuticles: Use cuticle oil regularly to keep your nails and surrounding skin moisturized.
- Protect Your Nails: When at the beach, use a top coat with UV protection to prevent fading and yellowing from sun exposure.
- Avoid Harsh Chemicals: When cleaning or using pool chemicals, wear gloves to prevent your nails from getting damaged.
- Get Regular Touch-Ups: To keep your nails looking fresh, schedule regular touch-ups. This will help maintain your sandy chic look and ensure your nails stay in tip-top shape.
How to Maintain Your Sandy Chic Beach Nails on the Go
You think that manicure will survive an actual beach? Cute.
Here’s how to not ruin it in five minutes.
-
Accept Defeat: Your nails will chip. It’s a promise. Bring your polish for emergency repairs.
-
Avoid the Ocean: Yes, really. A beach manicure’s worst enemy is the beach. A quick dip is fine. A two-hour soak will destroy it.
-
Keep Them Short: Long nails vs. a frisbee? The frisbee wins. Every time. It’s just common sense.
20 Sandy Chic Beach Nails That’ll Impress the Hell Out of People
Let’s be real for a second. Summer rolls around and suddenly there’s this weird pressure to have nails that match… the sand? Like your manicure is the final piece of some grand “beachside aesthetic” puzzle. It’s exhausting.
Another summer, another nail trend we’re supposed to care about. This year’s is “sandy chic.” Sounds like a boring paint swatch, right?
But here’s the upside: at least it’s not last year’s screaming neon that chipped in five seconds. The whole pitch is to look classy and effortless. We’ll see.
Will your manicure leave anyone “totally impressed”? Let’s be real, no. But maybe, just maybe, one of these designs won’t be completely cheesy. Let’s find out.
1. The Safe Bet (Seashell Ombré)
A nude-to-white fade. It’s the vanilla ice cream of beach nails. You can’t go wrong, but no one’s writing home about it. It’s for when you want to participate without actually participating.
2. The “I’m Going to a Beach Wedding” Look (Gold Glitter Tips)
A French manicure with glitter. Sure, it can look classy. But it’s also very, very specific. It says less “carefree beach day” and more “I have a formal event near some sand.”
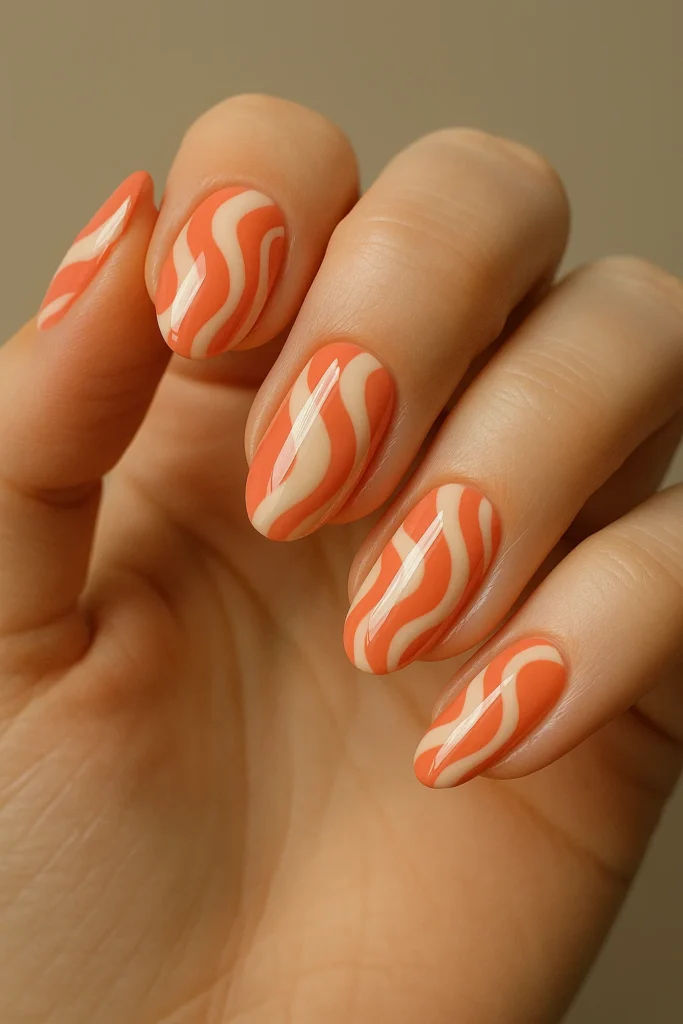
3. The Latte Art Manicure (Coral & Cream Waves)
This has potential. It could look like a cool, abstract swirl. Or it could look like your nail tech sneezed while polishing. High-risk, medium-reward.
4. The Tourist Trap (Matte Tan with Palms)
A tiny palm tree. Look, if you must, put it on one finger. Any more than that and you might as well be wearing an “I ❤️ a Tropical Location” t-shirt. It’s just so… literal.
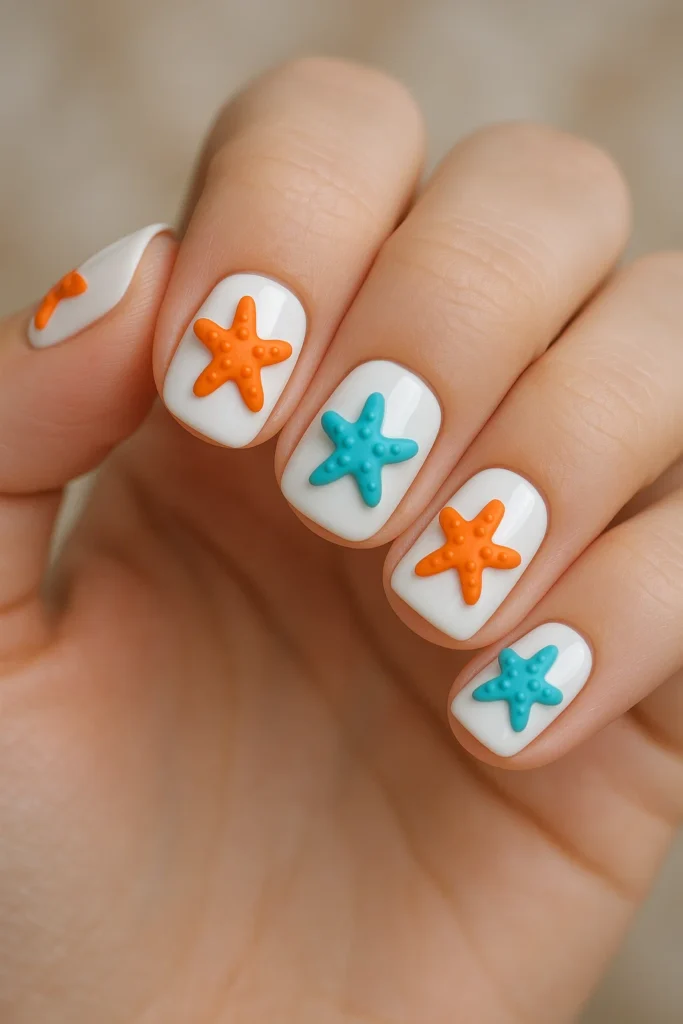
5. The “My Little Mermaid” Phase (White with Starfish)
We’re gluing starfish decals to our nails now? This is a hard pass. It’s for people who want their manicure to look like a decoration from a child’s bathroom.
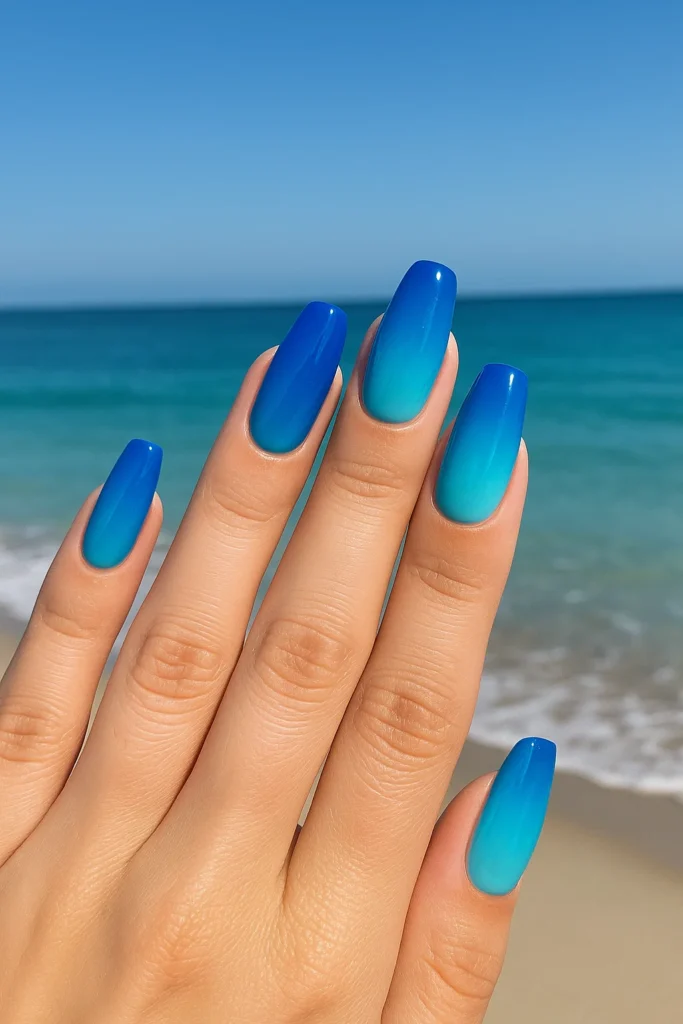
6. The Other Ombré (Ocean Blue Gradient)
It’s #1, but with blue. Again, it’s fine. It looks like a beach. We get it.
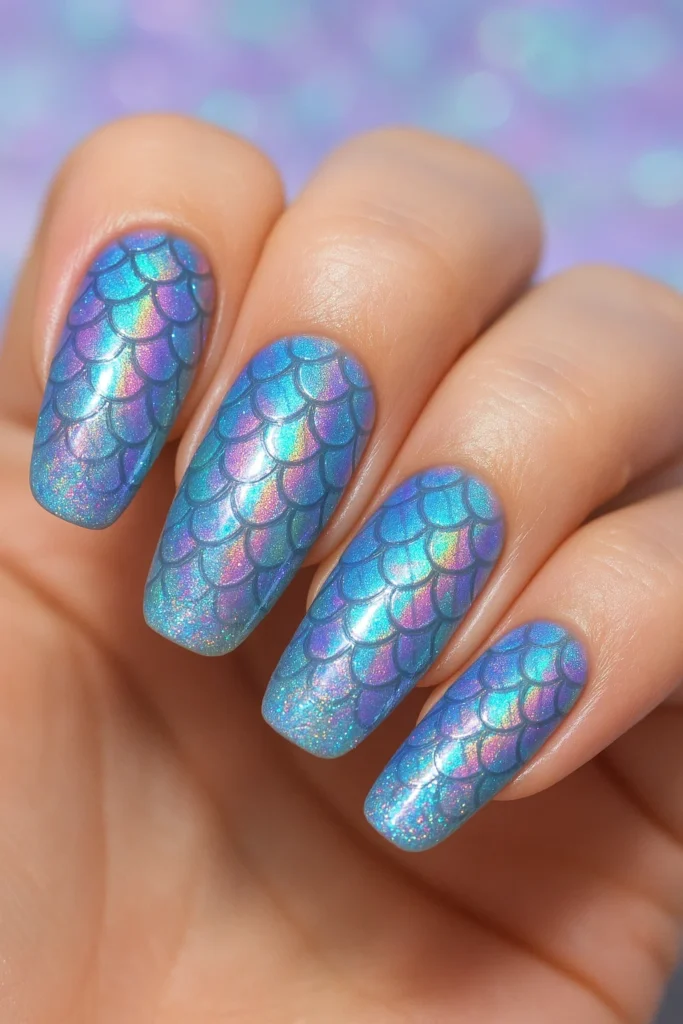
7. The Cosplay Option (Mermaid Scales)
Let’s not kid ourselves by calling this “elegant.” You’re putting mermaid scales on your fingers. It’s a costume piece. Fun for a festival, maybe? But for everyday life, you’re going to look like you just came from a kid’s birthday party.
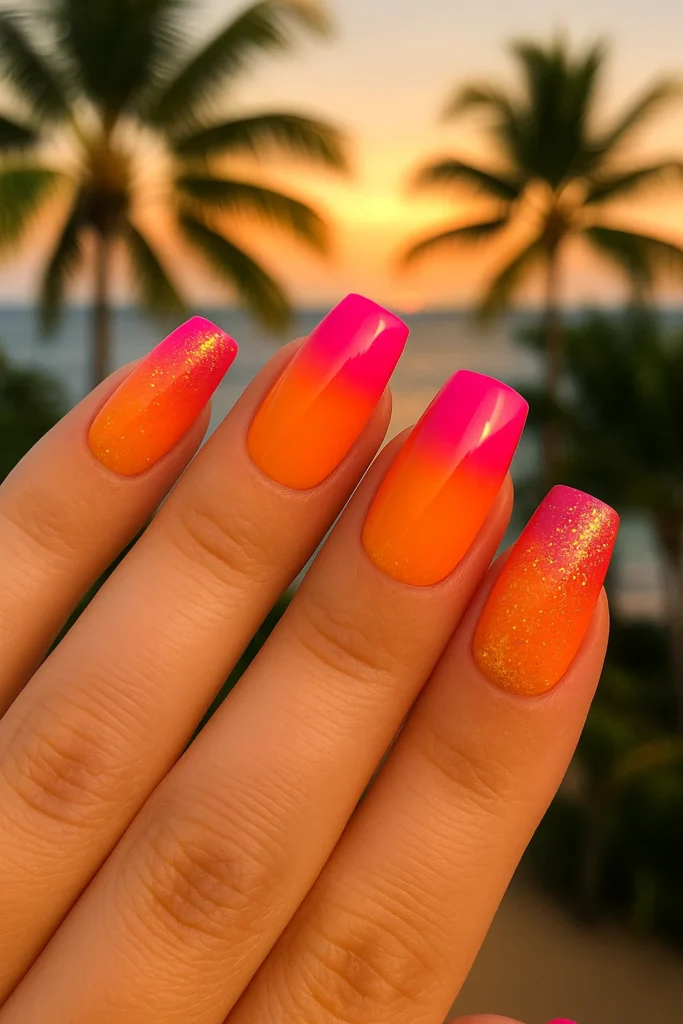
8. The Airbrushed T-Shirt (Sunset Ombré)
This has all the subtlety of an airbrushed van. Pink, orange, tan, and glitter? It’s doing way too much. This is how you end up with nails that look like a cheap souvenir.
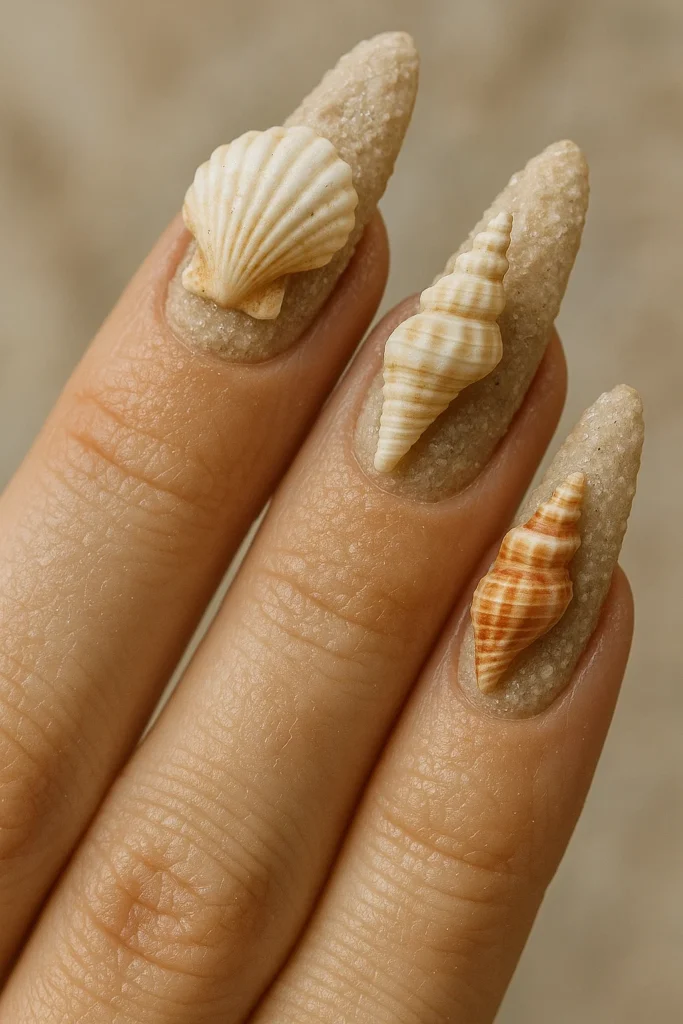
9. The “This Will Snag on Everything” Look (Seashell Embellishments)
Oh, good. 3D objects glued to your nails. Perfect for catching on your hair, your clothes, and any stray piece of fabric within a five-foot radius. It’s a gimmick, not a manicure.
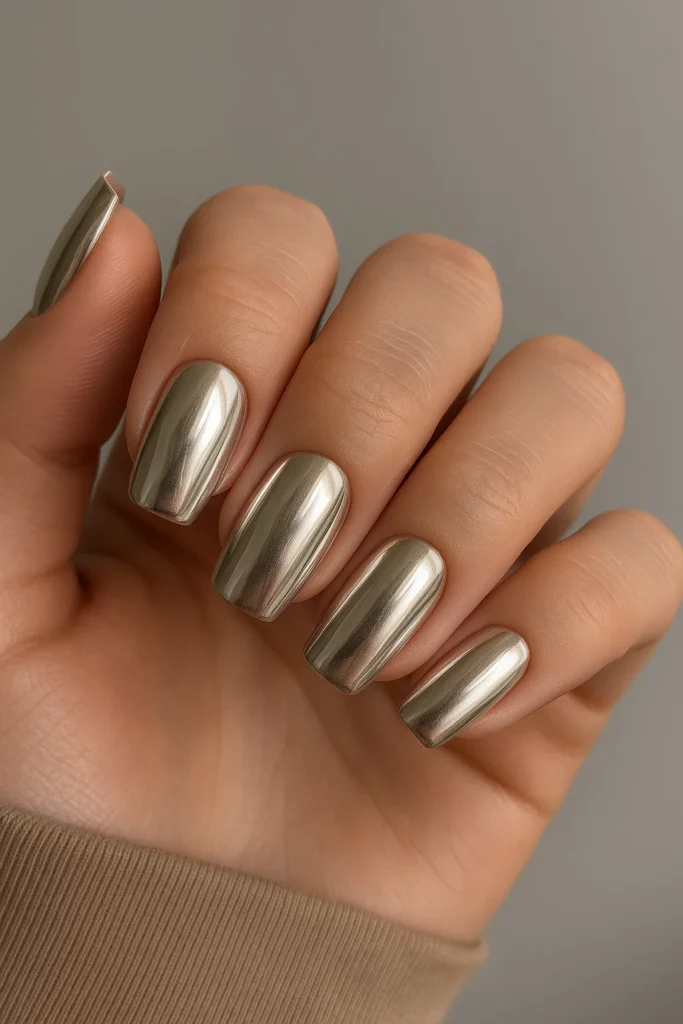
10. The Actually Cool One (Champagne Chrome)
Okay, I’ll give them this one. Chrome nails in a sandy, champagne color can look incredibly chic. It’s modern and glam without being cheesy. A solid choice.
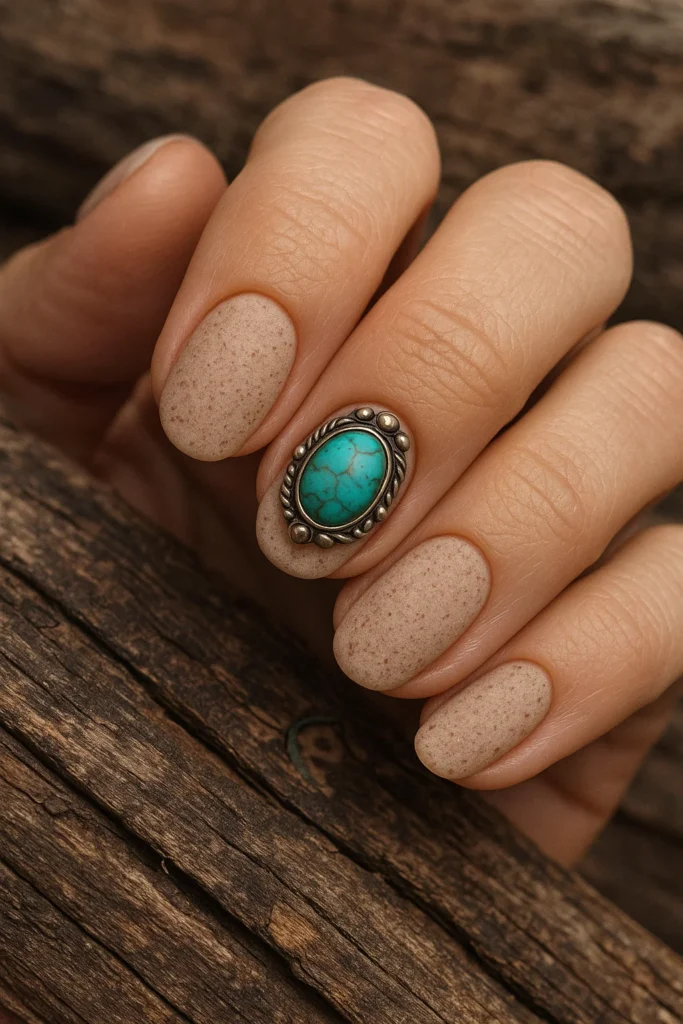
11. The Fake Jewelry Look (Turquoise Stones)
This is trying so hard to be boho. A textured polish with a fake turquoise gem? It rarely looks as good as the photo. You’re better off just wearing an actual turquoise ring.
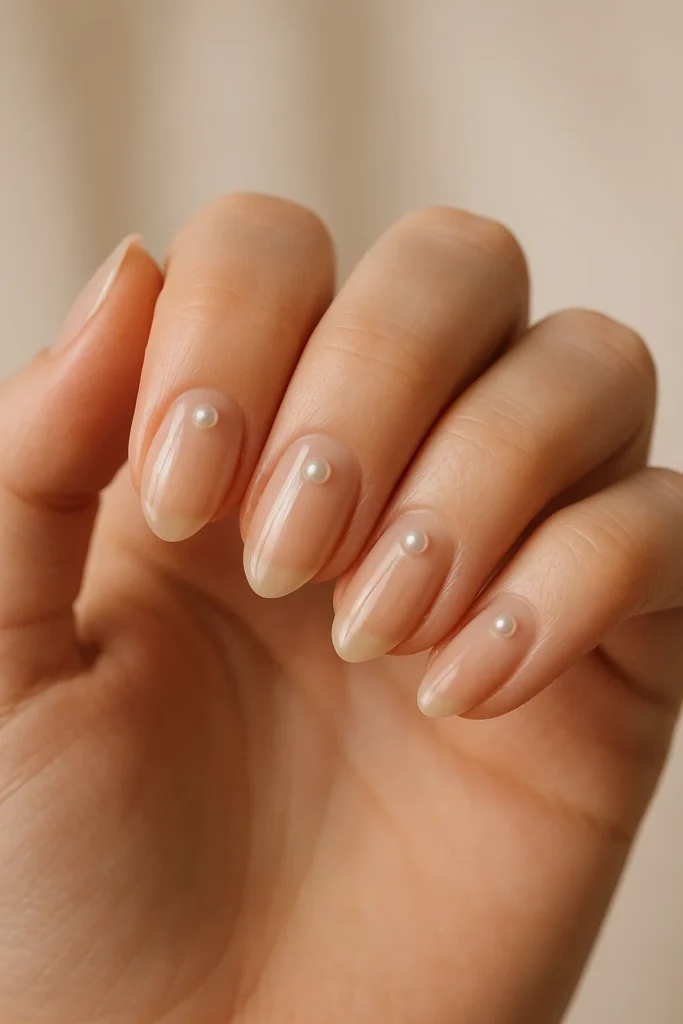
12. The “I Glued This Myself” Look (Pearl-Encrusted Nude)
See #9. Adding little pearls to your nails sounds delicate until the first one pops off and you’re left with a sad little glue smudge. High-maintenance and not worth it.
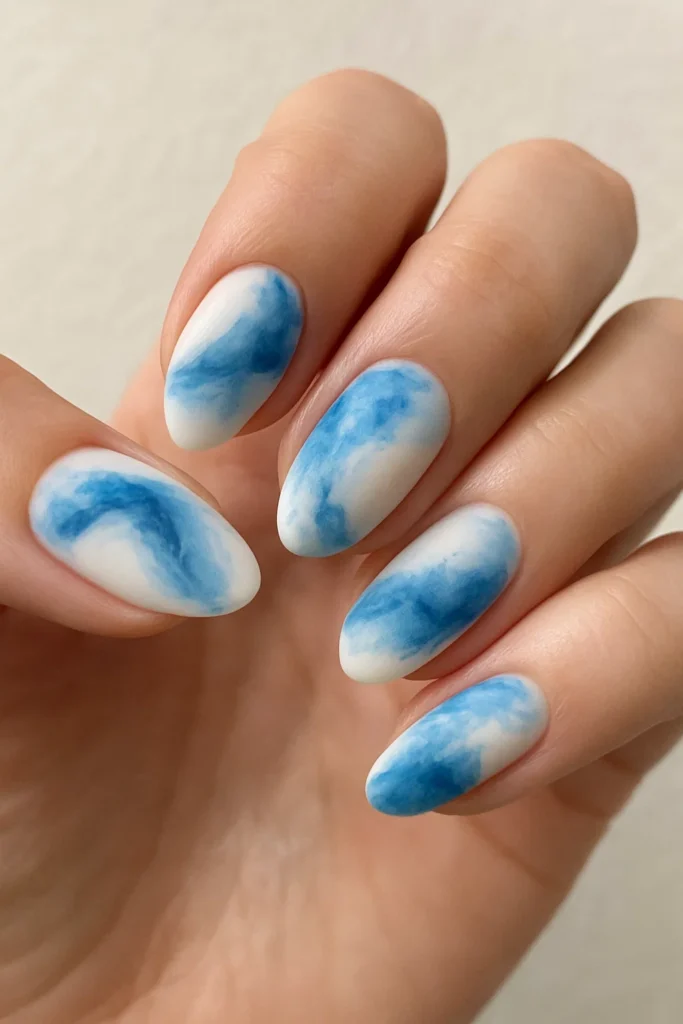
13. The High-Effort Smudge (Watercolor Waves)
In a perfect world, this is a dreamy, artistic masterpiece. In reality, it’s one shaky hand away from looking like you accidentally smudged three different polishes together.
14. The Actually Chic One (Driftwood Brown with Gold Foil)
This. This is a winner. A rich, earthy brown with a few random flecks of gold foil. It looks expensive. It looks intentional. It doesn’t scream “BEACH!” It just whispers “I have impeccable taste.”
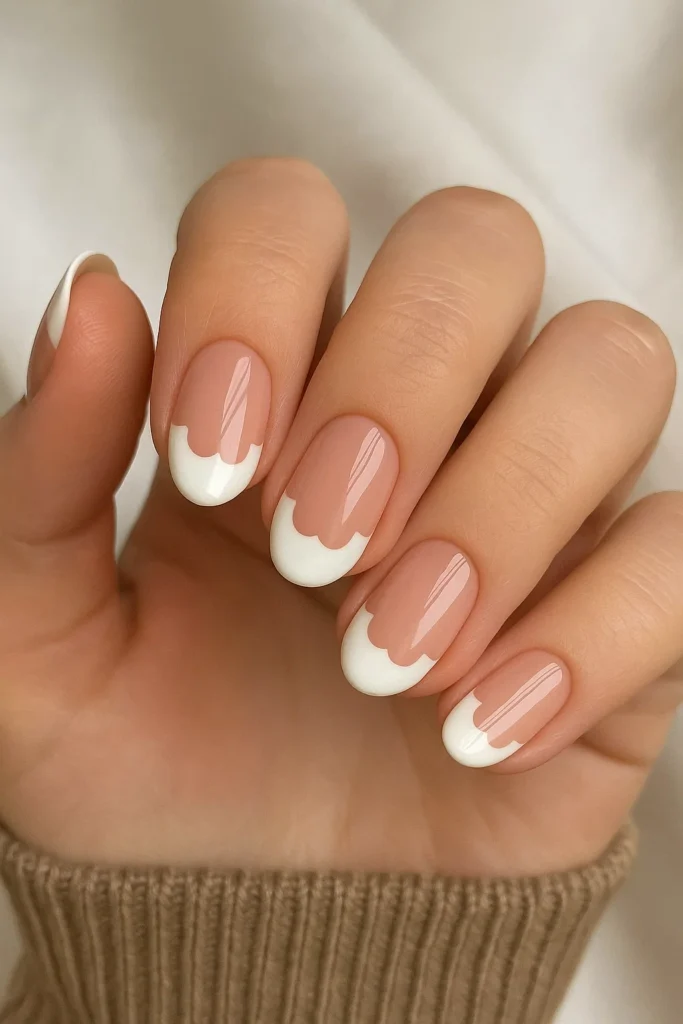
15. The Cutesy French (Scallop Tips)
It’s a French manicure, but with little half-circles. It’s… cute. A bit twee, maybe. If you find a regular French too severe, this is your slightly softer, more playful option.
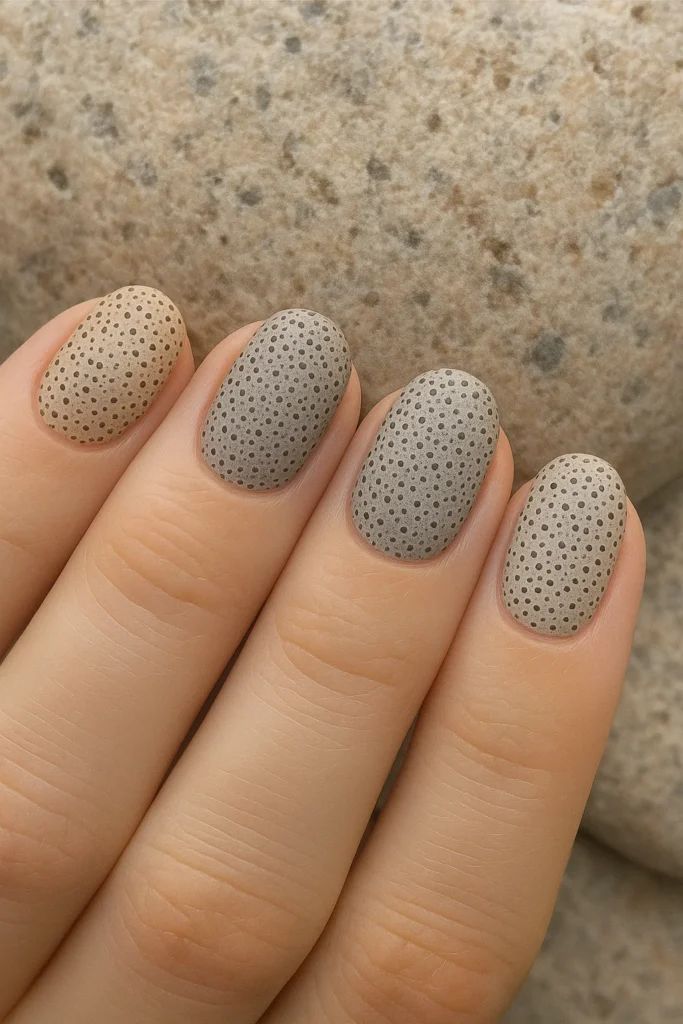
16. The “I Have Too Much Time” Manicure (Beach Pebble Dots)
So, you’re going to meticulously dot different shades of gray onto your nail to look like pebbles? It’s a neat idea, but the effort-to-payoff ratio seems wildly out of whack.
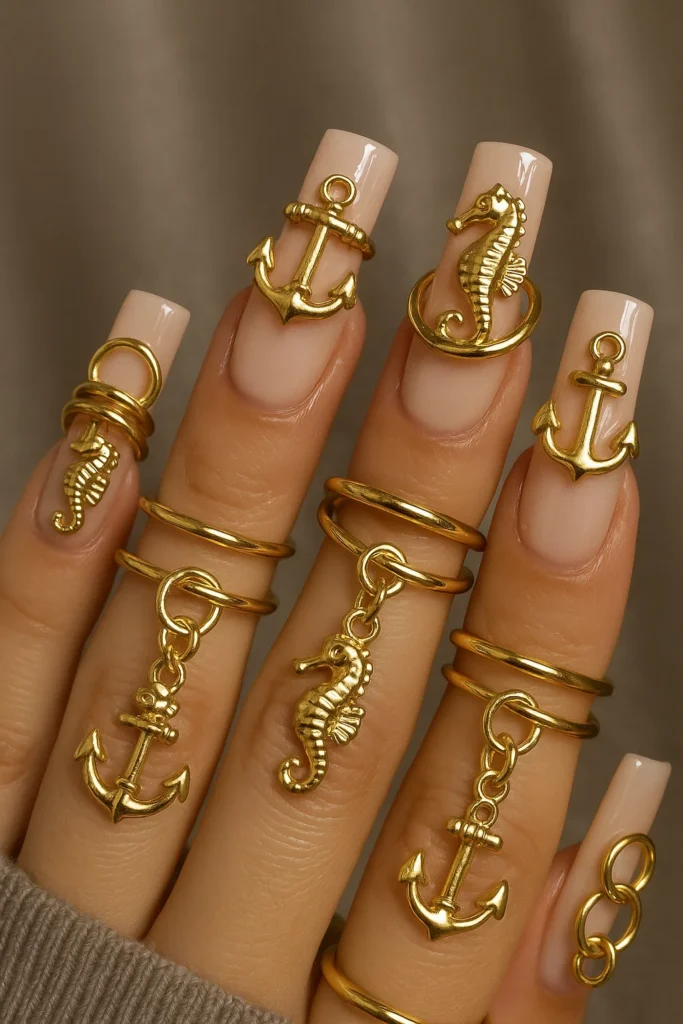
17. The Charm Bracelet Disaster (Ocean Charms)
Tiny metal anchors and sea horses glued to your nails. Why? Just… why? It’s #9 and #12 all over again. Gimmicky, impractical, and a little bit juvenile.
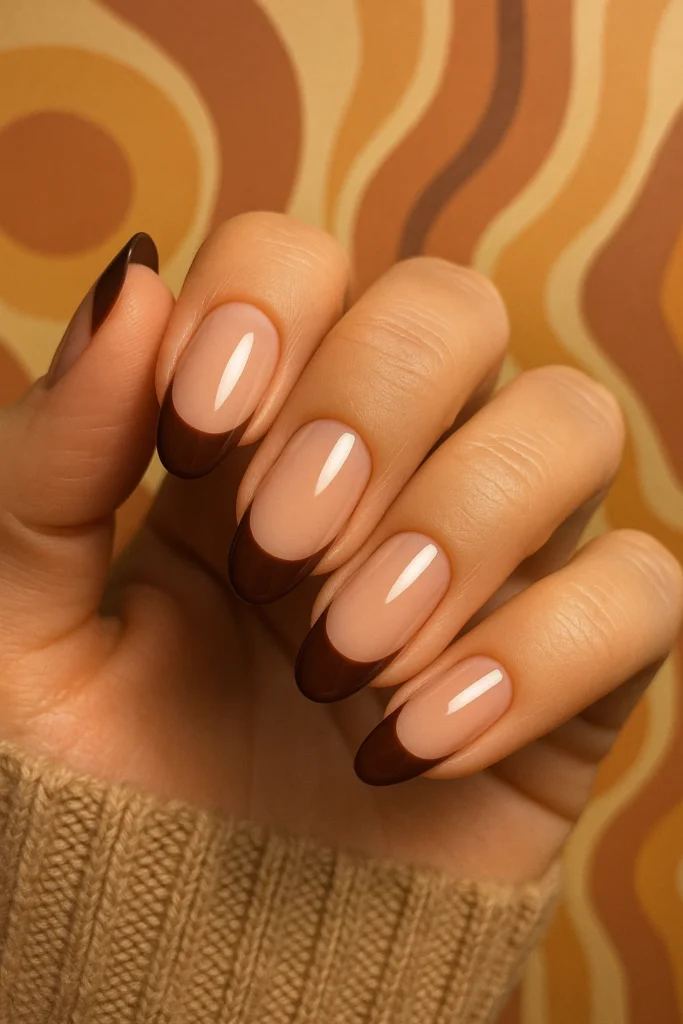
18. The 70s French Manicure (Coconut Brown Tips)
A French tip, but make it brown. It’s an earthy, retro take on a classic. I don’t hate it. It’s a solid, stylish choice for something different.
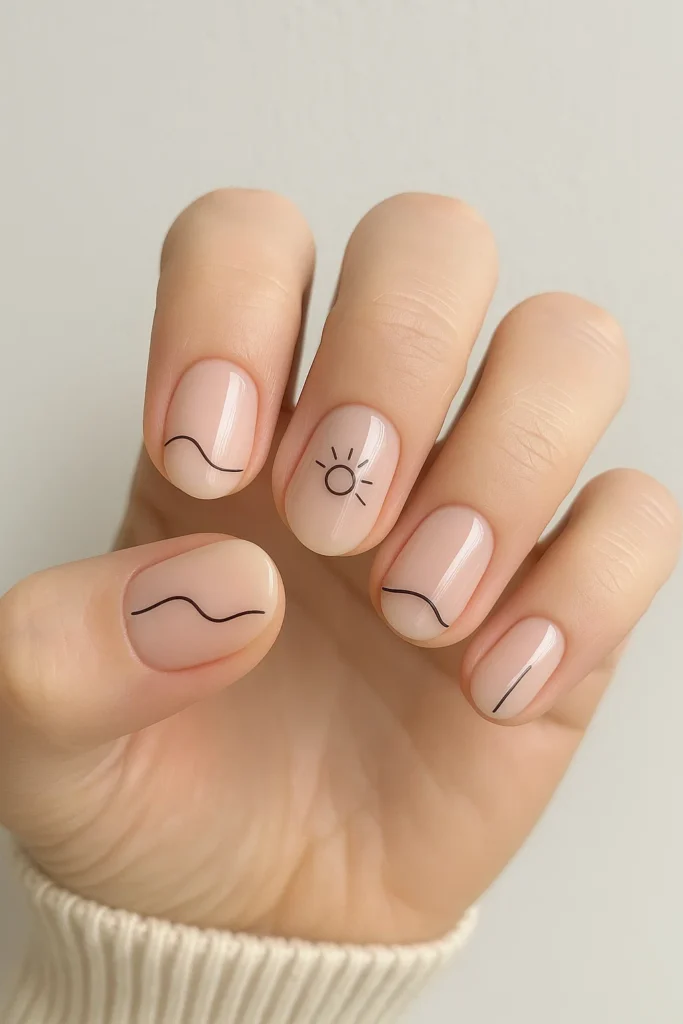
19. The One for Actual Minimalists (Minimalist Line Art)
Finally. A simple nude base with a single, thin line creating a wave or a sun. It’s modern, it’s subtle, and it’s undeniably chic. This is how grown-ups do nail art.
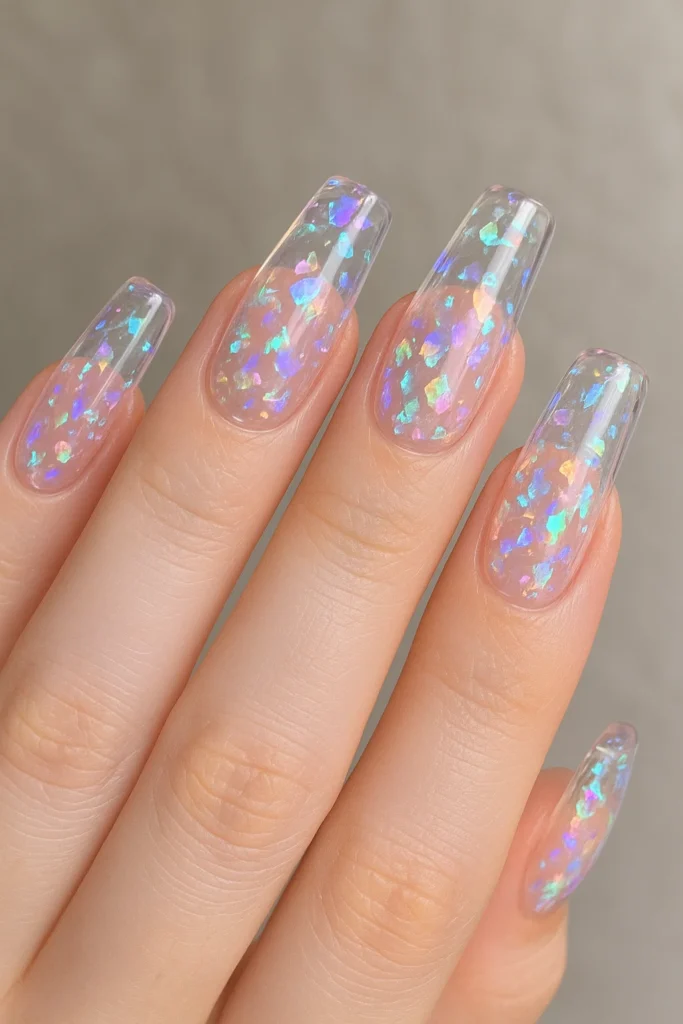
20. The TikTok Trend (Transparent Shell Nails)
Jelly nails are having a moment. A sheer, translucent polish with some iridescent flakes inside can look ethereal and cool. It’s very trendy, so it might not age well, but for right now? It works.
How to Maintain Sandy Chic Beach Nails All Summer
Now for the hard part: trying to keep it from looking like a complete disaster after one margarita and a single dip in the ocean. Let’s be real, a beach manicure’s natural habitat is its mortal enemy. But if you insist on trying to make it last, here’s the deal.
1. Re-Seal the Deal. Constantly.
Look, I know it’s a pain. But you need to re-slap on a top coat every few days. This is non-negotiable, especially if you skipped the gel. It’s the only thing standing between you and a chip. And if you got roped into one of those textured glitter looks? You’ll need two coats. Don’t skimp.
2. Stop Letting Your Hands Turn to Dust.
You know what ruins the whole “effortless beach goddess” vibe? Ragged, peeling cuticles. Sun, salt, and chlorine are basically a death sentence for moisture. So get some decent cuticle oil. Use it. Morning and night. It takes two seconds and stops your hands from looking like you’ve been digging for clams with them.
3. The Best Way to Protect Your Beach Manicure? Avoid the Beach.
Right. I’m not even kidding. The single best way to preserve your ocean-themed nails is to avoid prolonged contact with the ocean. Salt and chlorine are the villains here; they’ll fade your color and weaken the polish until it just gives up. Some people might tell you to wear gloves while swimming. Those people are insane. Just rinse your hands with fresh water after you get out of the pool or ocean and immediately follow with lotion.
4. Your Nails Are Not Tools. Seriously.
This should be obvious, but here we are. Your nails are not a box cutter, a sticker peeler, or a can opener. The number one reason your manicure is chipped is because you used your finger like a Swiss Army knife. Stop it.
5. Prevent the Snag.
You know when a tiny snag on the edge of your nail turns into a catastrophic, day-ruining chip? This is how you prevent that. A quick, light file once a week to smooth out any rough edges. That’s it. It’s preventative maintenance.
So, there you have it. The “effortless” beach manicure requires a surprising amount of effort. Who knew? It’s a lot of work just to have your hands look good while holding a sweating cocktail. But hey, at least you’ll get a good picture out of it.
At the end of the day, “sandy chic” is just a fancy name for beige-adjacent nails with the occasional, very calculated, bit of sparkle or a tiny design.
Are you going to walk into a room and “wow everyone you meet” with your new tan manicure? Let’s be real. Of course not. They’re nails. People have their own problems to worry about.
But here’s the actual, non-marketing-speak takeaway: It’s a trend that, for once, isn’t obnoxiously loud or ridiculously high-maintenance. It’s a solid choice for a summer where you want to look put-together without having to think too hard about it.
Frequently Asked Questions About Sandy Chic Beach Nails
Q: What even are “sandy chic” nails?
A: A fancy name for beige nails. Sometimes with a single, tasteful gold fleck. That’s it.
Q: How do I keep them from chipping?
A: Don’t go to the beach. Seriously. But if you must, re-apply a top coat every two days.
Q: Can I do this myself at home?
A: A solid color? Sure. For the “art”? Use stickers. Your hand-painted “palm tree” will just look like a sad smudge otherwise.
Q: How long will it actually last?
A: A week. Maybe. If you don’t use your hands for anything. Like, at all.
Q: Can I go nuts with the glitter?
A: No. A fine shimmer is chic. Chunky glitter is a cry for help.

